
It’s not enough to just plant seeds to turn your vegetable garden into a colorful, unique area. Adding rock painting ideas for veggie garden is one of the most inventive and enjoyable ways to make your garden more charming. Painted rocks serve a variety of purposes, such as labeling plants, keeping pests away, or just making your outdoor area more cheerful. In this blog, we’ll look at some amazing rock painting ideas for your veggie garden that are simple to complete and appropriate for all skill levels.
[This post may contain affiliate links. What does that mean to you? Well, if you click on a product and make a purchase, I may get some compensation from you at no charge. If you want to read the boring stuff my full disclosure can be found here.]
Why Use Painted Rocks in Your Veggie Garden?
Painted rocks are a useful and adaptable addition to any garden, and they are not only ornamental elements. There are many advantages to using painted rocks in your vegetable garden, regardless of your level of gardening experience. Here’s a detailed look at why you should consider utilizing painted rocks in your outdoor space:
1. Serve as Plant Markers to Identify Herbs, Vegetables, or Flowers
Plant markers are among the most useful applications for painted rocks in a vegetable garden. When you’re growing several types of the same produce or when seedlings look alike, it’s easy to forget what you planted. Painted pebbles can remedy this problem by acting as robust, weather-resistant labels.
- How to Use Them: For each plant, paint its name or a small picture of it on the rock. Such as a rock shaped like a tomato for your tomato plants or a basil leaf for your herb yard.
- Benefits: Unlike plastic or wooden markers, painted rocks won’t fade or break easily. They’re also good for the earth and don’t stand out in a natural garden setting.
2. Add a Pop of Color and Personality to Your Garden Beds
Incorporating some personality and creativity into your veggie garden can elevate its purpose beyond just functionality. One fun and easy way to do this is by using painted rocks to add splashes of color and charm to your garden beds.
- How to Use Them: Paint rocks with vivid, striking hues or elaborate patterns, then arrange them thoughtfully throughout your garden. For instance, scatter flowers painted on rocks, make a rainbow border, or arrange them in patterns.
- Benefits: The brilliant hues of painted rocks can make your garden visually appealing, converting it into a happy and inviting area. Additionally, they give your garden a personal touch that makes it truly yours.
3. Act as Natural Pest Deterrents (Bright Colors Can Scare Away Certain Critters)
You won’t believe it, but painted rocks can be used for more than just decoration. Pests may be scared away by brightly colored pebbles, which can help protect your plants from pests.
- How to Use Them: Use bright, reflecting paints on rocks, like orange, red, or yellow. Put them next to plants that pests can hurt, like lettuce or cabbage.
- Benefits: Some bugs, like rabbits and birds, are scared off by bright, strange colors. Chemicals may not be needed as much when rocks are used to scare or confuse them.
4. Provide a Creative Outlet and a Fun Activity for the Whole Family
Painting on rocks isn’t just a nice way to make your yard look better; it’s also a great way to let out your creativity and have fun with your family. For those who are gardening with kids or just want to relax, painting rocks can be a fun exercise.
- How to Use Them: Have fun with your art by getting some brushes, watercolor paints, and smooth rocks. You can paint anything, from simple shapes to complicated patterns. You could even do it as a family project where everyone makes something.
- Benefits: Painting on rocks is a great way to relax and show your creativity. The garden is a fun way for kids to connect with nature and be proud of what they’ve grown. It’s also a pretty cheap way to make your garden look better.
Additional Benefits of Using Painted Rocks in Your Veggie Garden
- Durability: A durable addition to your landscape, rocks are inherently strong and resilient to inclement weather.
- Eco-Friendly: Painting rocks is a long-lasting choice that won’t hurt the environment like plastic markers or decorations.
- Versatility: Painted rocks can be used for many things, like putting names on plants, making art installations, or even making paths in the yard.
- Low Maintenance: After being painted and sealed, rocks don’t need much upkeep, so they’re a hassle-free addition to any garden.
1. Vegetable and Herb Labels: A Creative and Practical Garden Solution

One of the most useful and visually appealing ways to use painted rocks in your veggie garden is by turning them into vegetable and herb labels. Not only do these personalized garden markers help you keep track of what’s growing in your yard, they also make your outdoor space more interesting and fun. This page has all the information you need to make and use these painted rock labels:
Why Use Painted Rocks as Plant Labels?
- Durability: Unlike plastic or wooden markers, rocks are sturdy and can withstand rain, wind, and sun without fading or breaking.
- Eco-Friendly: Rocks are a natural, sustainable material that won’t harm the environment, and unlike plastic or wooden markers, they are sturdy and can withstand rain, wind, and sun without fading or breaking.
- Aesthetic Appeal: Hand-painted rocks give your garden a personal and artistic touch that makes it more inviting and unique.
- Functionality: They also serve as clear, easy-to-read markers that help you and others identify plants at a glance.
How to Create Vegetable and Herb Labels with Painted Rocks
Step 1: Gather Your Supplies
Before you start, make sure you have the following materials:
- Smooth, flat rocks (collected from your yard, a riverbed, or a craft store)
- Acrylic paints (weather-resistant and vibrant)
- Paintbrushes (various sizes for detailing)
- Pencil or chalk (for sketching designs)
- Weatherproof varnish or sealant (to protect your designs)
- A clean cloth or paper towels (for wiping surfaces)
Step 2: Choose Your Design
The secret to making vegetable and herb labels that work is to make them visually representative of the plants they’re marking. Here are some ideas:
- Tomato Plants: Paint the top of a round, red rock with green leaves.
- Carrot Patch: Paint an orange, carrot-shaped rock with green leafy tops.
- Lettuce or Spinach: To symbolize these greens, paint a rock with patterns of leafy green.
- Basil or Herbs: Apply a verdant leaf or the word “Basil” in a sophisticated script.
- Peppers: Paint a rock in the shape and color of the pepper variety (e.g., green, red, or yellow).
Step 3: Paint Your Rocks
- Clean the Rocks: After giving the rocks a good cleaning to get rid of any dirt, let them to air dry.
- Sketch Your Design: Draw your pattern softly on the rock using a pencil or chalk. This helps direct your artwork.
- Base Coat: Cover the surface of the rock with a base coat of paint. Use orange for carrots and red for tomatoes, for instance. Let it dry completely.
- Add Details: Use smaller brushes to create features like leaves, stems, or text. For example, add green leaves to your tomato rock or white lines to your carrot rock for a lifelike touch.
- Label Clearly: If you’re adding text, write the plant’s name in a clear, readable font using a paint pen or fine brush.
Step 4: Seal Your Designs
It’s important to protect your painted rocks with a weatherproof varnish or sealant so they last all year. For example:
- It’s best to let the paint dry overnight.
- Using a brush or spray, put down a thin, even layer of sealer.
- As directed by the maker, let the sealant dry.
- For extra longevity, add a second coat.
Step 5: Place Your Painted Rock Labels in the Garden
Once your rocks are ready, it’s time to place them in your garden:
- Positioning: Place each rock at the base of the plant that goes with it or somewhere close that can be seen.
- Grouping: More than one of the same kind of plant can be put together with a single rock label.
- Creative Arrangement: Place the rocks in a way that goes with the way your garden is laid out. For a fun look, you could line them up along the edge of a flower bed or spread them out among the plants.
Tips for Success
- Keep It Simple: Start with easy patterns, like simple shapes or labels in one color, if you’re new to rock painting.
- Use Bright Colors: You can see better with bright, bold colors, and they make your garden feel happier.
- Involve the Family: Have the whole family paint rocks together. Kids can help paint easier patterns, which makes it a fun project to do with other people.
- Update Regularly: As the seasons change, make sure that the labels on your rocks show what you’ve planted or harvested.
Benefits of Using Painted Rocks as Vegetable and Herb Labels
- Personalization: You can show off your creativity and style in your garden.
- Organization: You won’t have to guess which plant is which anymore because your rocks will label everything.
- Durability: Labels made of paper or plastic will fade and break easily, but painted rocks won’t.
- Aesthetic Appeal: The colorful, hand-painted designs add a unique and artistic touch to your garden.
2. Ladybug and Bee Rocks: Celebrating Garden Pollinators

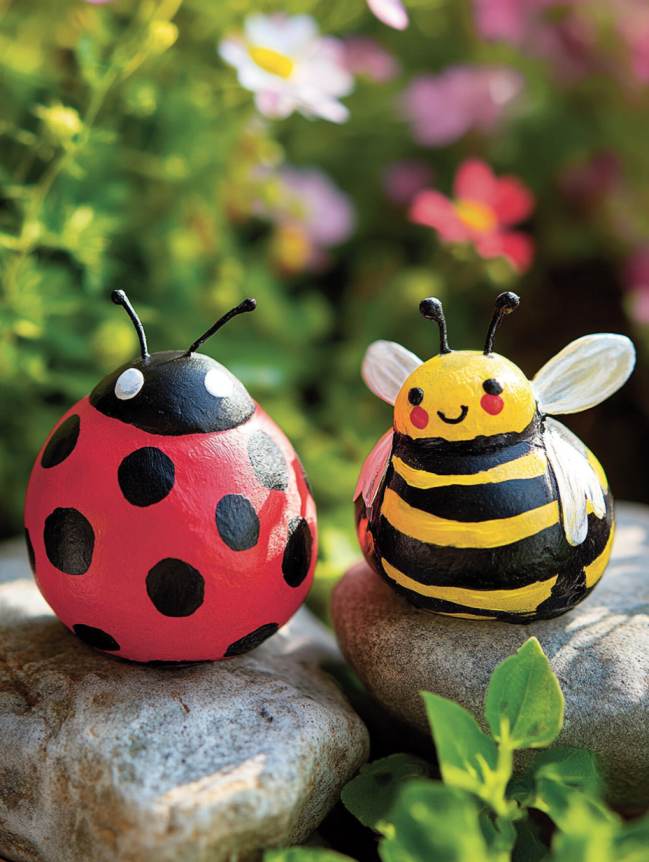
Adding ladybug and bee rocks to your veggie garden is a delightful way to celebrate the pollinators that play a crucial role in helping your plants thrive. These charming painted rocks not only add a touch of whimsy but also serve as a reminder of the importance of protecting these beneficial insects.
How to Create Ladybug and Bee Rocks
- Ladybug Rocks:
- Paint the rock red and let it dry.
- Add a black head and a line down the center for the wings.
- Use a fine brush to dot the wings with black spots.
- Add small white dots for eyes and tiny antennae.
- Bee Rocks:
- Paint the rock yellow and let it dry.
- Add black stripes across the body.
- Paint a small white face with black eyes and a smile.
- Add tiny wings using white or light blue paint.
Placement Ideas
- Scatter ladybug and bee rocks among your flowers or vegetable plants.
- Place them near pollinator-friendly plants like lavender, sunflowers, or basil.
- Create a “pollinator corner” in your garden where these rocks can be displayed prominently.
Benefits
- Educational: Teach kids about the importance of pollinators in the garden.
- Aesthetic: Add a playful and colorful element to your garden.
- Symbolic: Celebrate the hard work of bees and ladybugs in helping your garden grow.
3. Inspirational Garden Quotes: Uplifting Messages for Your Garden
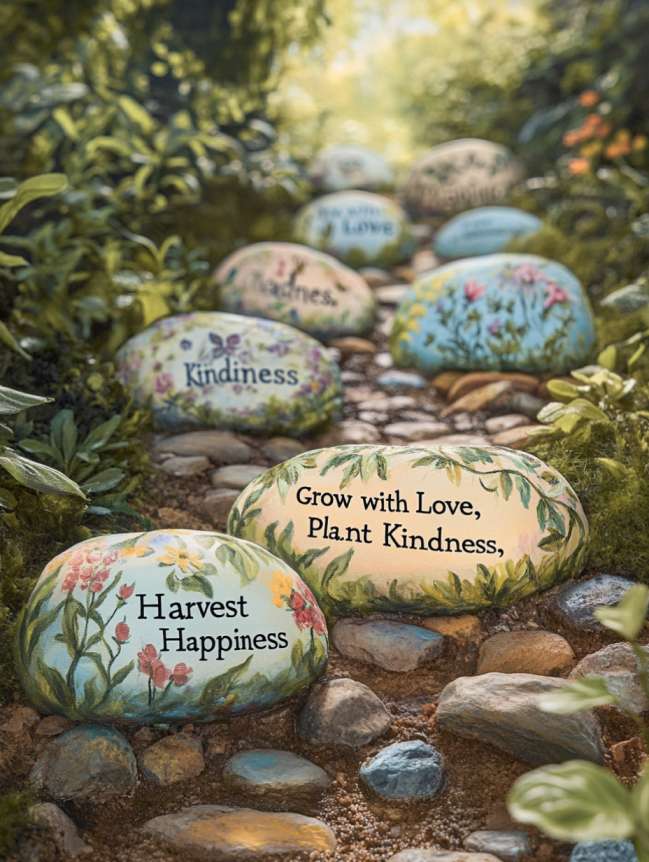
Inspirational garden quotes painted on rocks can bring positivity and motivation to your veggie garden. These little stones with uplifting messages can brighten your day as you tend to your plants and create a serene, thoughtful atmosphere.
How to Create Inspirational Quote Rocks
- Choose Your Message: Use simple, positive phrases such as “Grow with Love,” “Plant Kindness” or “Harvest Happiness.”
- Paint the Base: Use a light tone paint as background (white or pastel yellow, pastel green, etc.
- Add the Text: Use a fine brush or paint pen to neatly write the quote. You could also use stencils for a sleeker effect.
- Decorate: Micro-style tiny designs around the texts—think flowers, leaves, vines.
Placement Ideas
- Set quote rocks among flowerbeds, or along garden paths, or near seating areas.
- Now tuck them into flower beds or vegetable patches for surprise element.”
- Consider creating a “motivation corner” where multiple quote rocks can be on display together.
Benefits
- Emotional Uplift: These gems can act as daily tokens of positivity and gratitude.
- Personal Touch: Reflect your personality and values in your garden.
- Conversation Starters: Inspire visitors with your thoughtful messages.
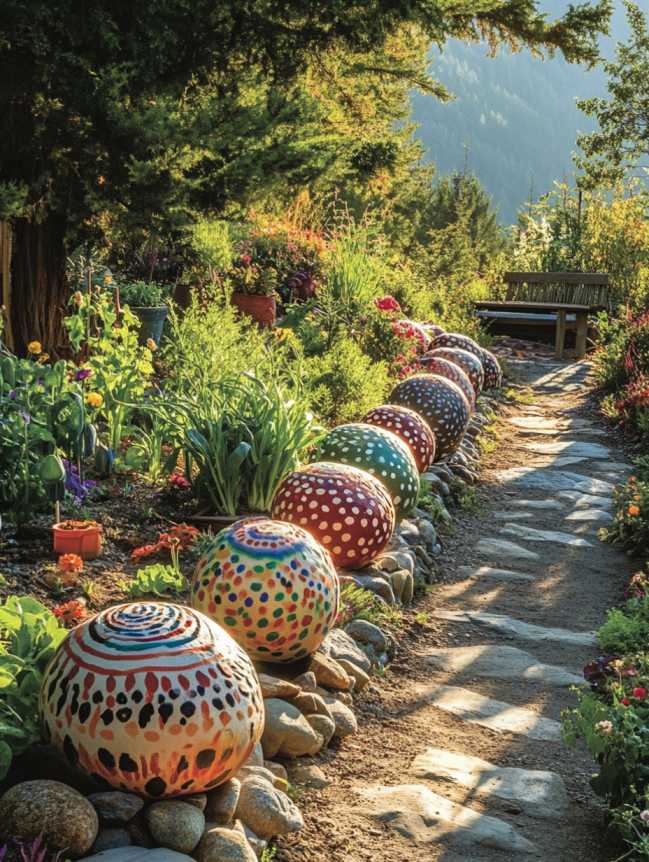
4. Rainbow Rocks: A Burst of Color for Your Garden
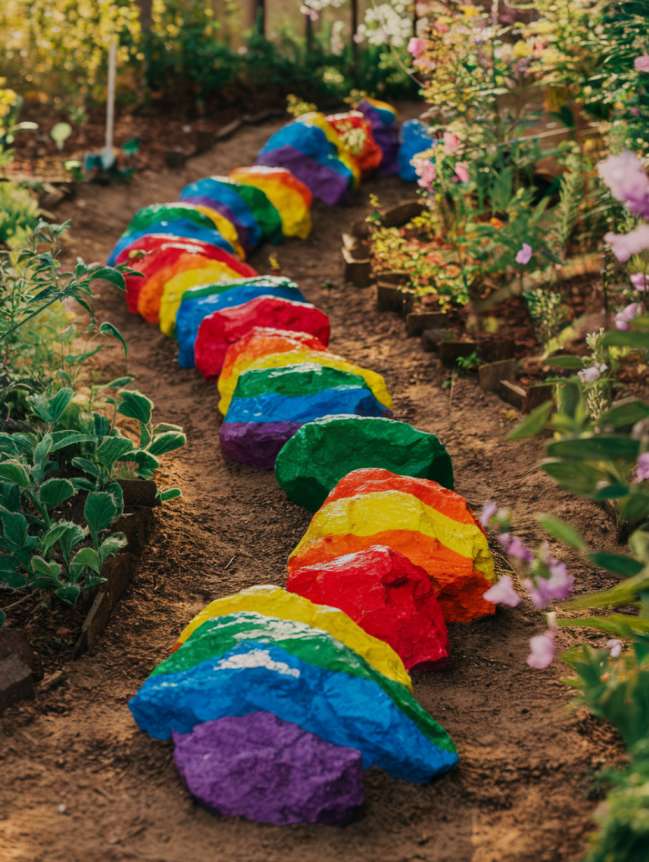
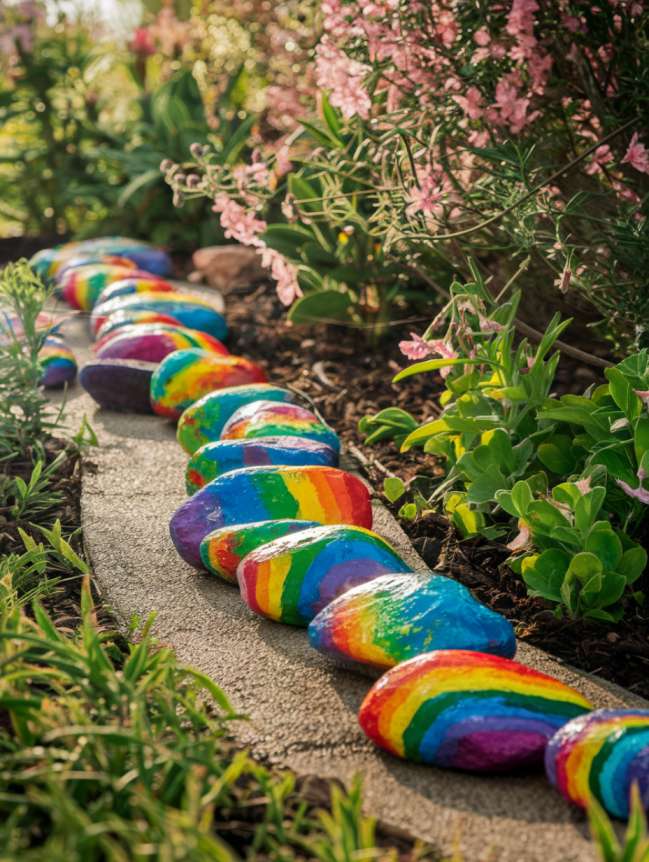
A great idea to give your vegetable garden a bright, cheery feel is with rainbow rocks. These vibrant sculptures can serve as decorative additions or as borders or paths.
How to Create Rainbow Rocks
- Choose Your Colors: Red, orange, yellow, green, blue, and purple are examples of vivid, striking colors to use.
- Paint the Rocks: Apply a single coat of paint on each rock, or use color blending to produce gradient effects.
- Add Details: Include swirls, polka dots, or stripes for added flair.
- Seal the Design: Apply a weatherproof sealer on the design to prevent color fading.
Placement Ideas
- Line the edges of your garden beds with rainbow rocks.
- Create a colorful pathway by placing them in a row.
- Scatter them throughout the garden for pops of color.
Benefits
- Visual Appeal: Brighten up your garden with a rainbow of colors.
- Mood Booster: The vibrant hues can lift your spirits and create a joyful atmosphere.
- Versatility: Rainbow rocks can be used in countless ways to enhance your garden’s design.
5. Animal-Themed Rocks: Playful Garden Friends
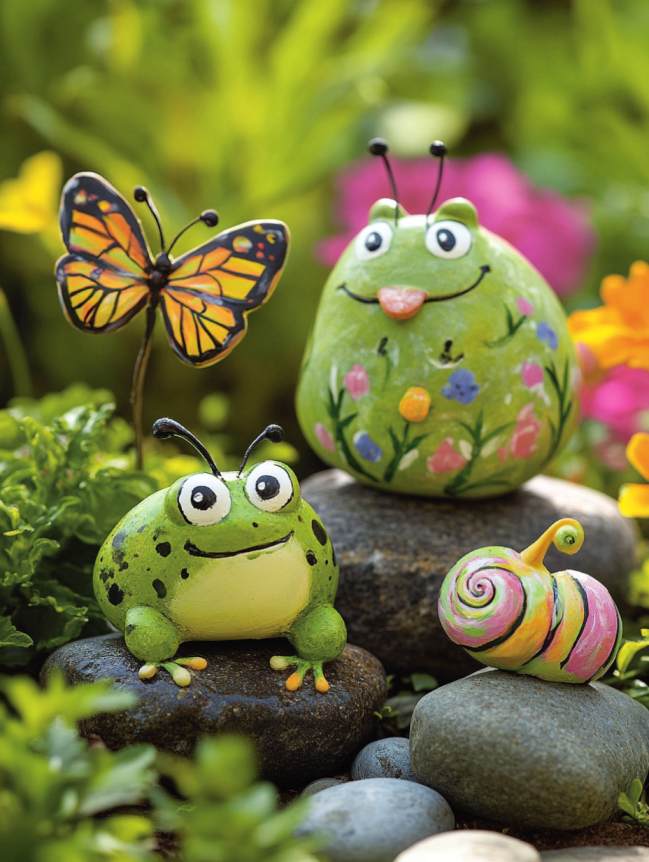
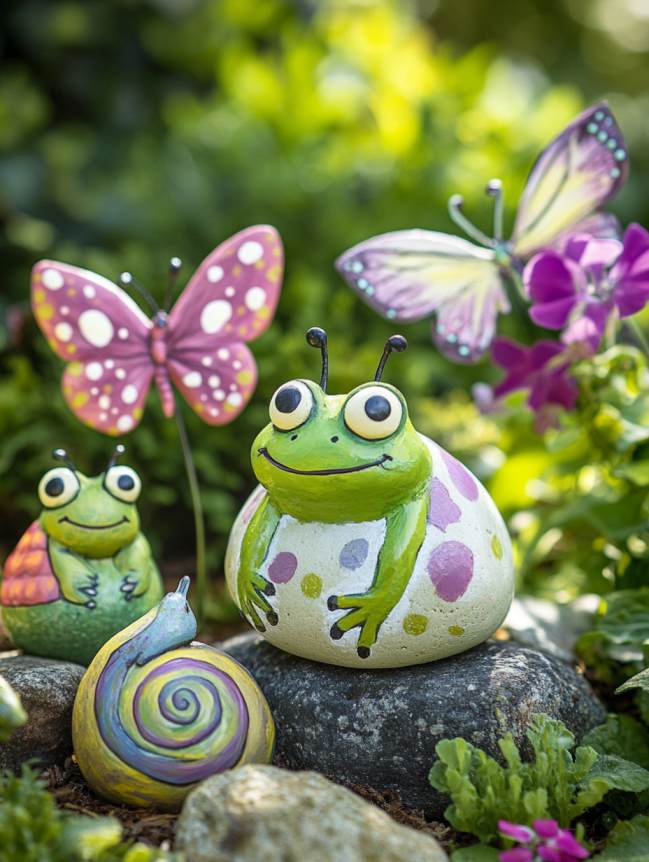
Animal-themed rocks bring a playful and whimsical touch to your veggie garden. Paint rocks to resemble frogs, butterflies, snails, or other garden-friendly creatures to create a lively and fun environment.
How to Create Animal-Themed Rocks
- Frog Rocks:
- Paint the rock green and add big white eyes with black pupils.
- Add a wide smile and small red dots for cheeks.
- Butterfly Rocks:
- Paint the rock in bright colors and add symmetrical wing patterns.
- Use a fine brush to add intricate details like dots and lines.
- Snail Rocks:
- Paint a spiral shell on the rock using vibrant colors.
- Add a small head with antennae and a smile.
Placement Ideas
- Place frog rocks near water features or damp areas.
- Scatter butterfly rocks among flowers or pollinator plants.
- Tuck snail rocks into shady, cool spots in the garden.
Benefits
- Playful Atmosphere: Add a sense of fun and wonder to your garden.
- Kid-Friendly: Children will love spotting these cute creatures.
- Thematic Design: Create a cohesive garden theme with animal-inspired rocks.
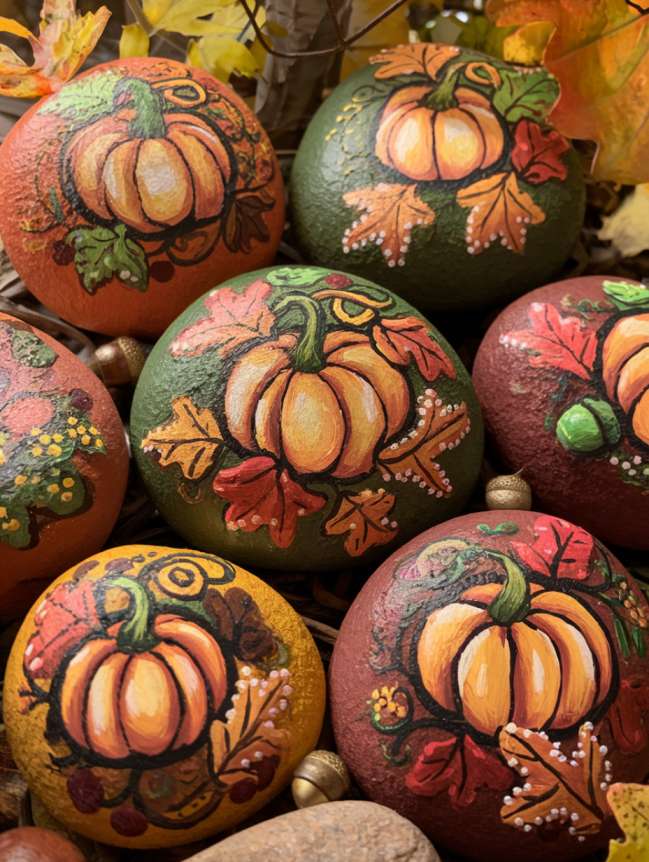
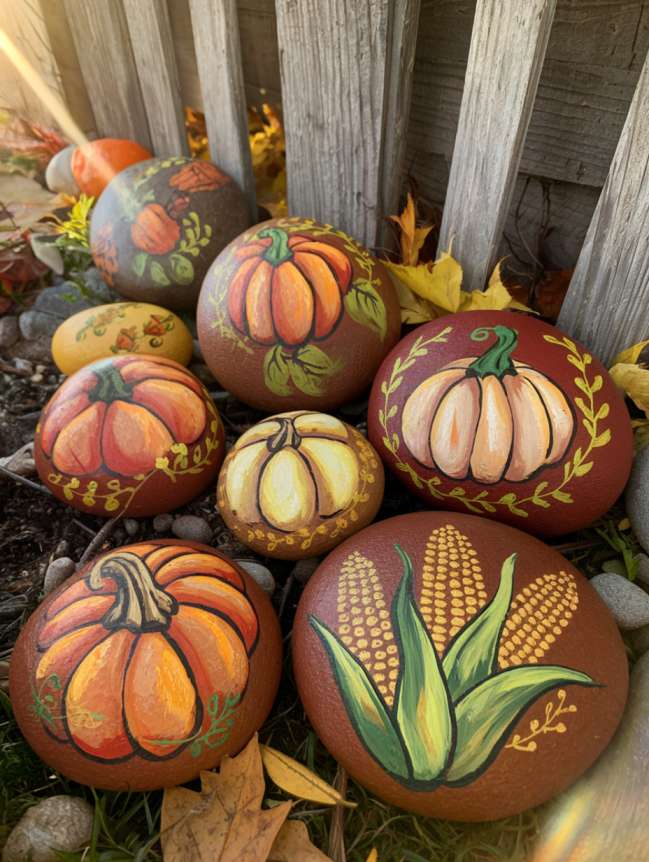
6. Seasonal Designs: Celebrate the Changing Seasons
- For Fall Season


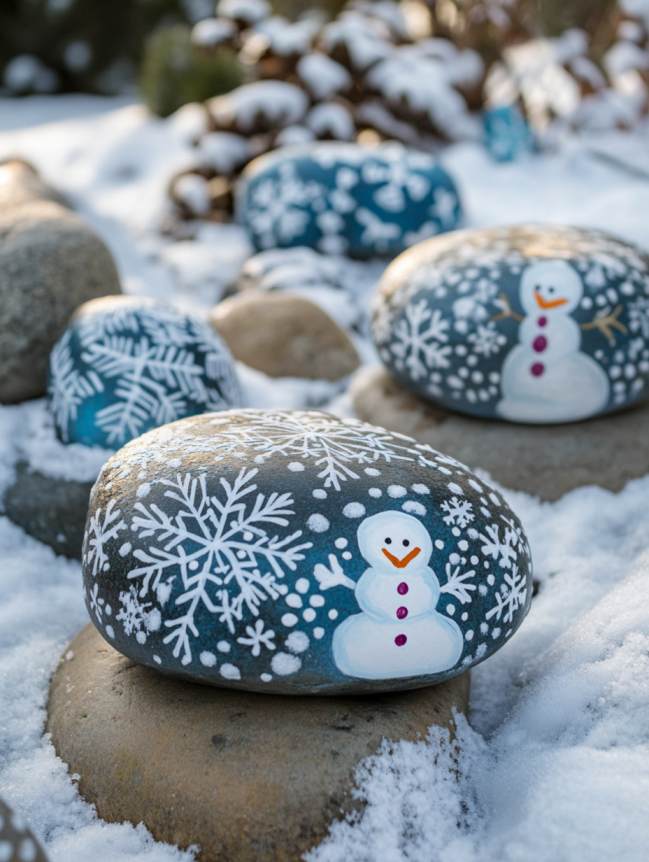
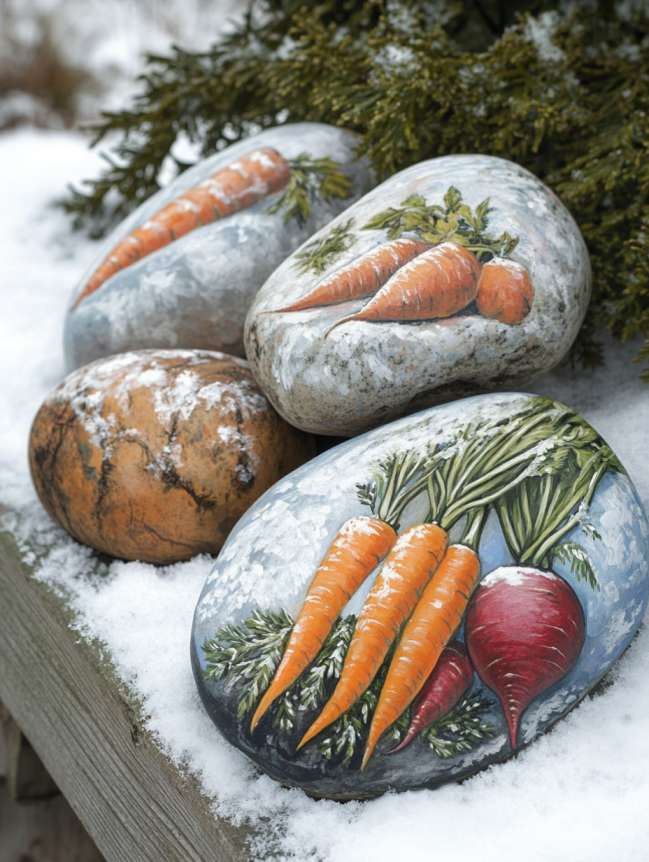
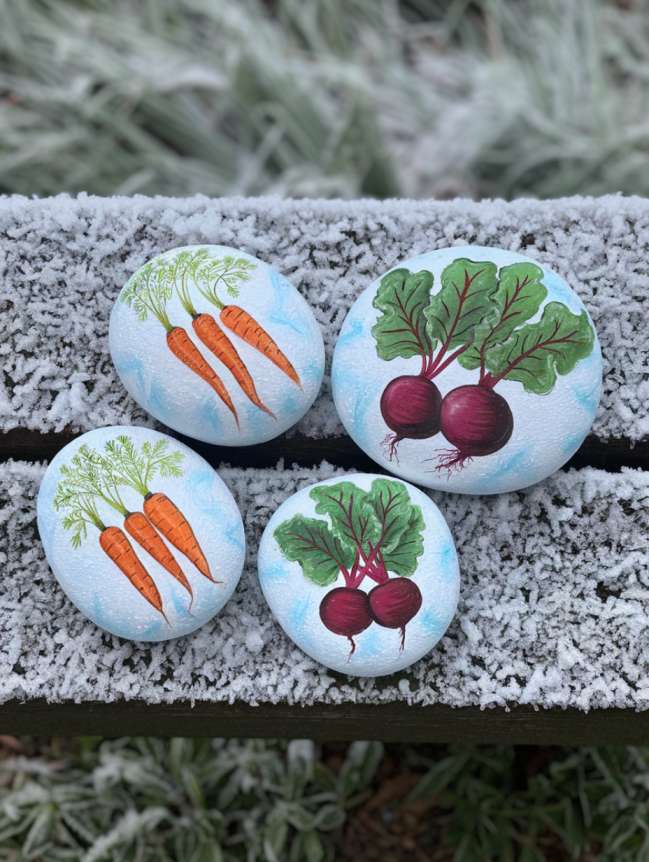
2. For Winter Season
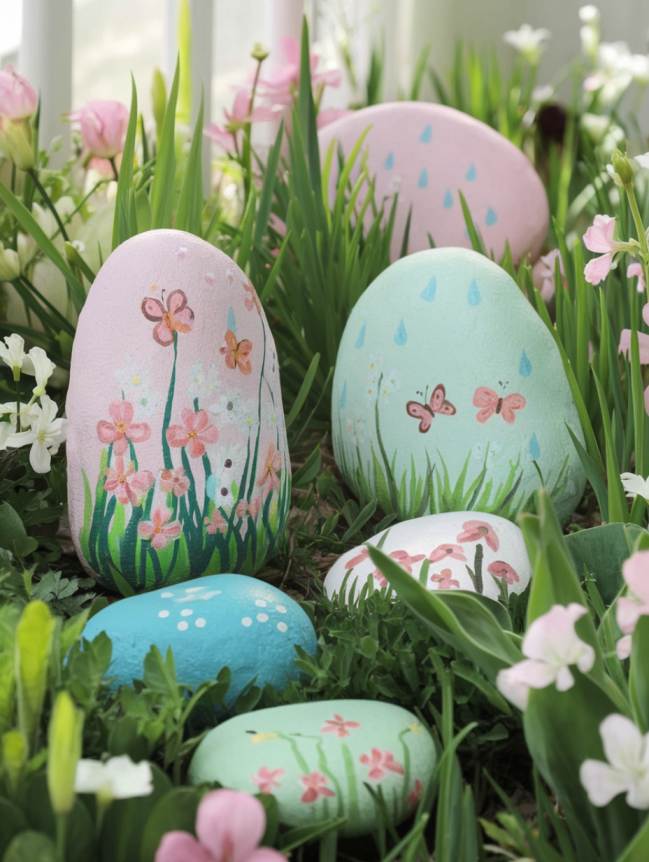
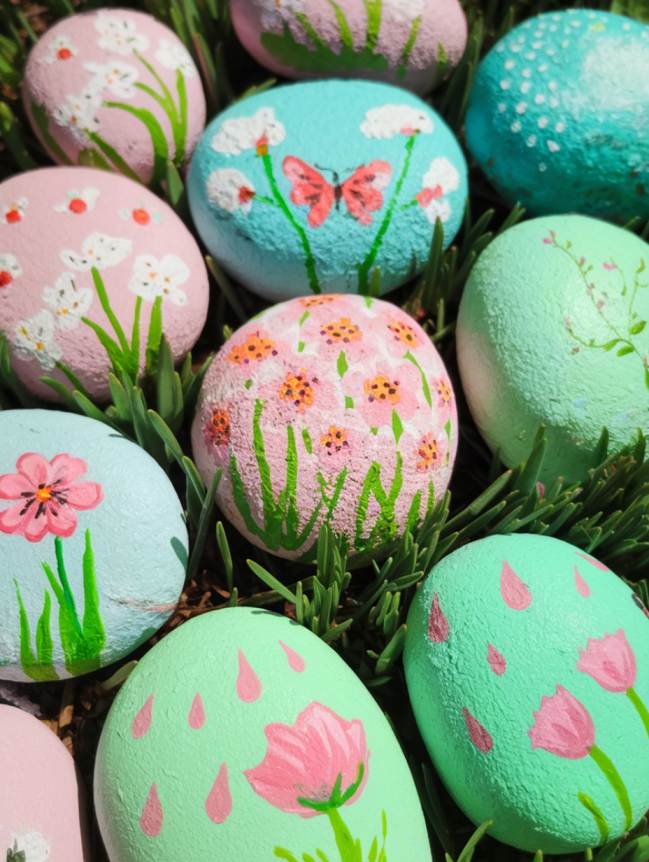
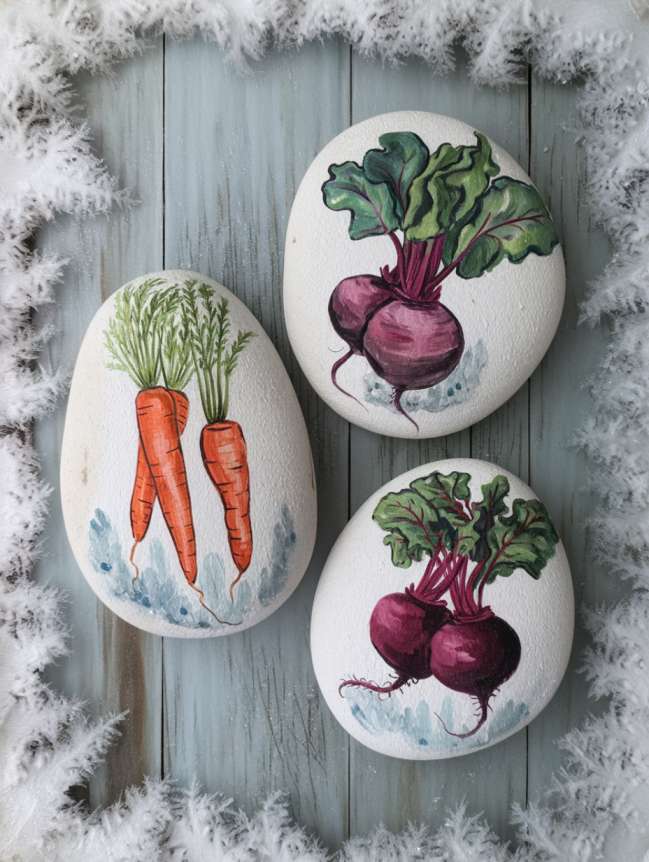
3. For Spring Season

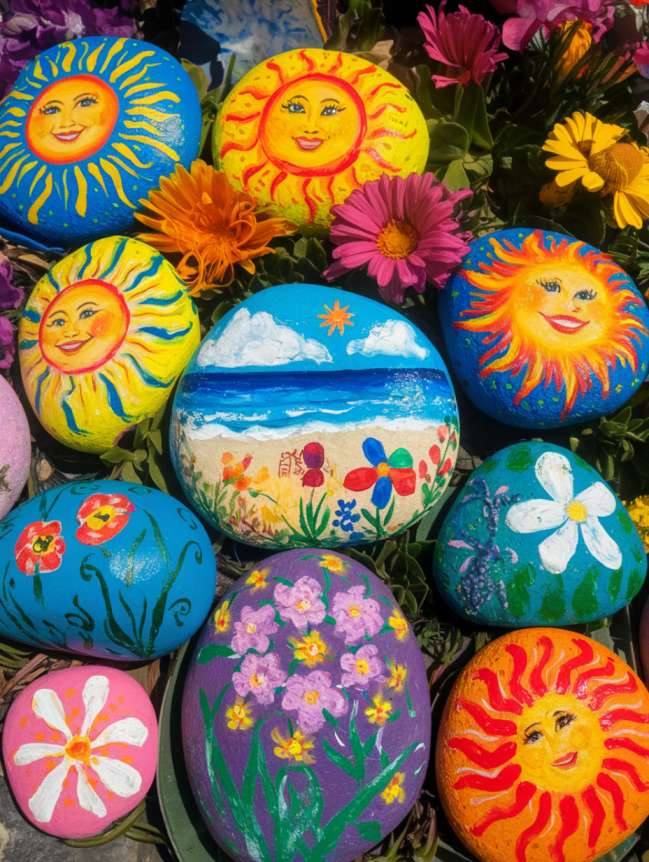
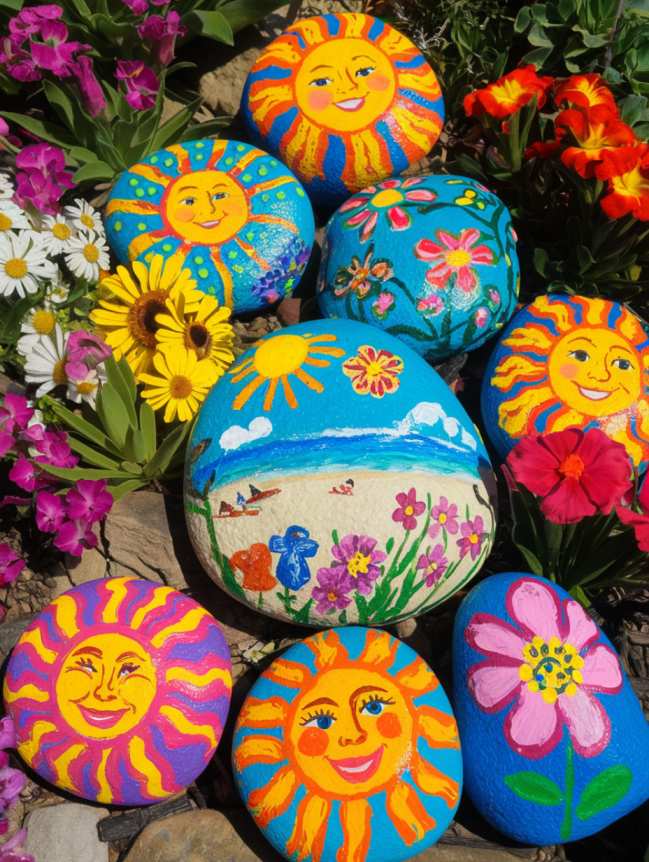
4. For Summer Season
Seasonal rock designs allow you to update your garden’s look throughout the year. From pumpkins in the fall to snowflakes in the winter, these rocks keep your garden fresh and festive.
How to Create Seasonal Rocks
- Fall: Paint pumpkins, leaves, and acorns in warm autumn colors.
- Winter: Paint snowflakes, snowmen, and icy patterns in cool blues and whites.
- Spring: Paint flowers, butterflies, and raindrops in pastel colors.
- Summer: Paint suns, beach scenes, and bright flowers in vibrant hues.
Placement Ideas
- Use seasonal rocks to decorate garden borders or pathways.
- Create a seasonal display in a specific area of your garden.
- Swap out rocks as the seasons change to keep your garden looking fresh.
Benefits
- Timely Decor: Reflect the current season in your garden’s design.
- Creative Outlet: Experiment with different themes and colors throughout the year.
- Festive Atmosphere: Celebrate holidays and seasonal changes with themed rocks.
7. Mini Garden Scenes: Tiny Canvases for Big Imagination


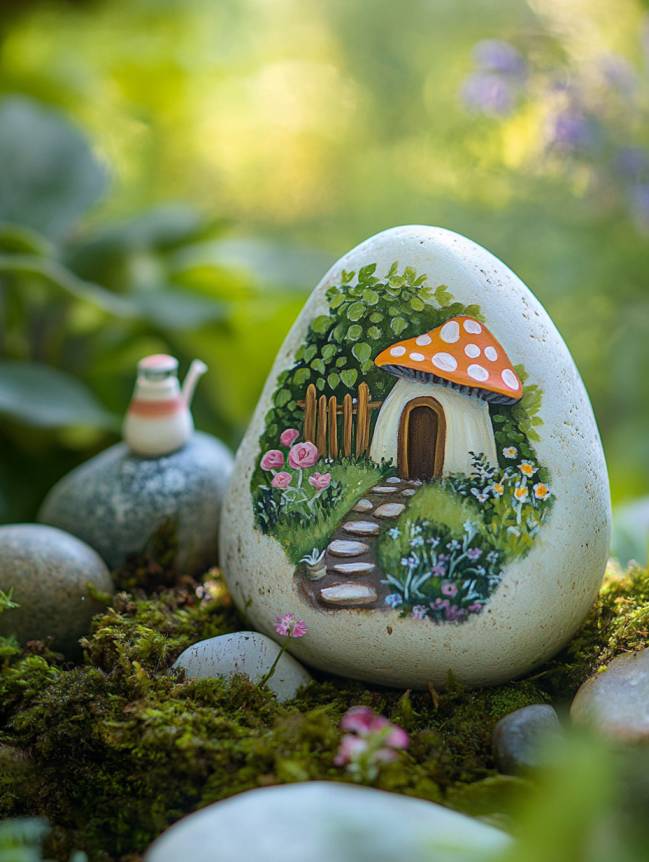
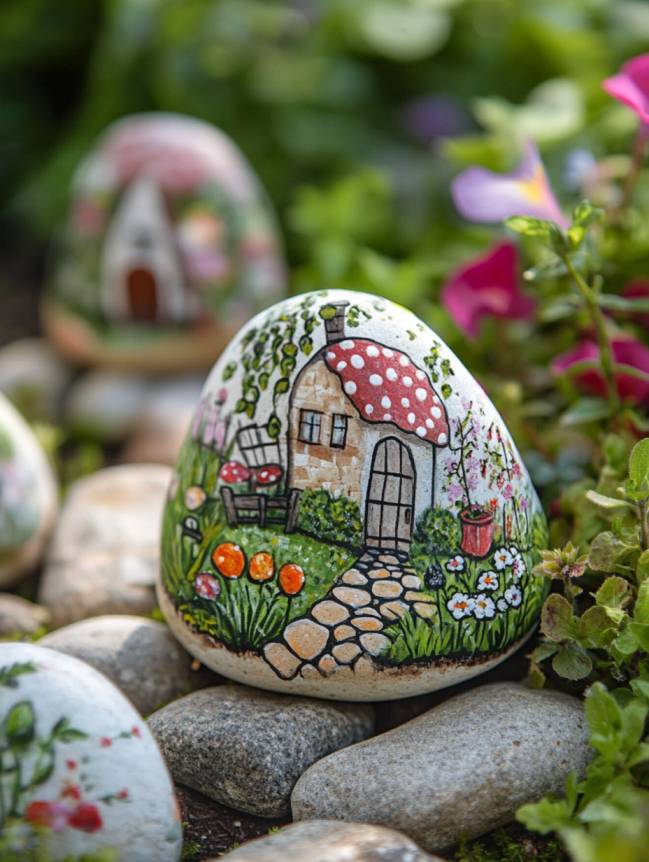
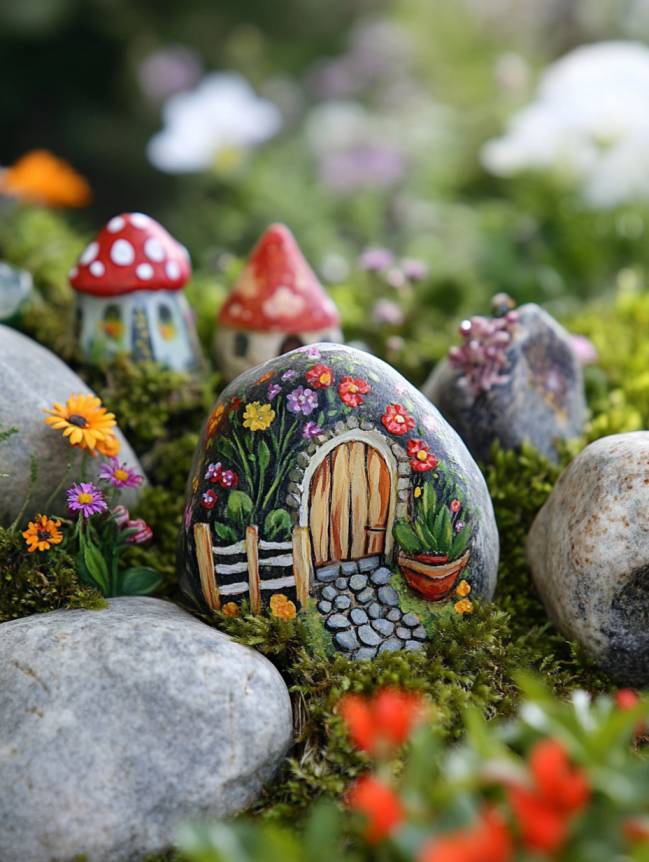
Mini garden scenes painted on rocks allow you to create tiny worlds within your veggie garden. These detailed designs can tell a story or add a whimsical touch to your outdoor space.
How to Create Mini Garden Scenes
- Choose a Theme: Paint a small vegetable patch, a watering can, a garden fence, or a tiny house.
- Add Details: Use fine brushes to add intricate details like plants, animals, or textures.
- Seal the Design: Protect your artwork with a weatherproof sealant.
Placement Ideas
- Place mini garden scene rocks near corresponding elements in your garden (e.g., a watering can rock near your hose).
- Create a “story corner” where multiple scene rocks are displayed together.
- Use them as focal points in your garden beds.
Benefits
- Storytelling: Add a narrative element to your garden.
- Artistic Expression: Showcase your creativity and attention to detail.
- Unique Decor: Make your garden stand out with one-of-a-kind designs.
8. Glow-in-the-Dark Rocks: Magical Nighttime Accents
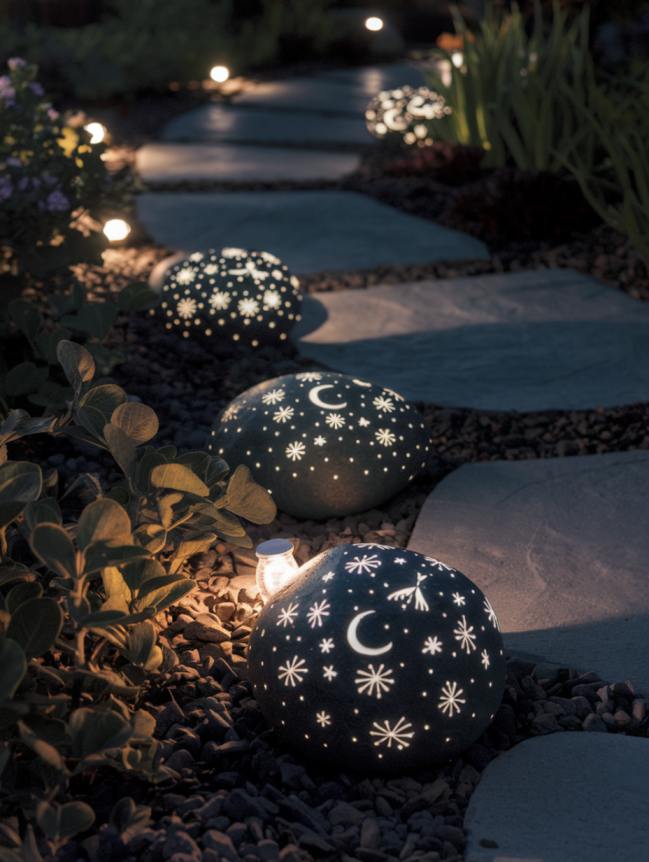
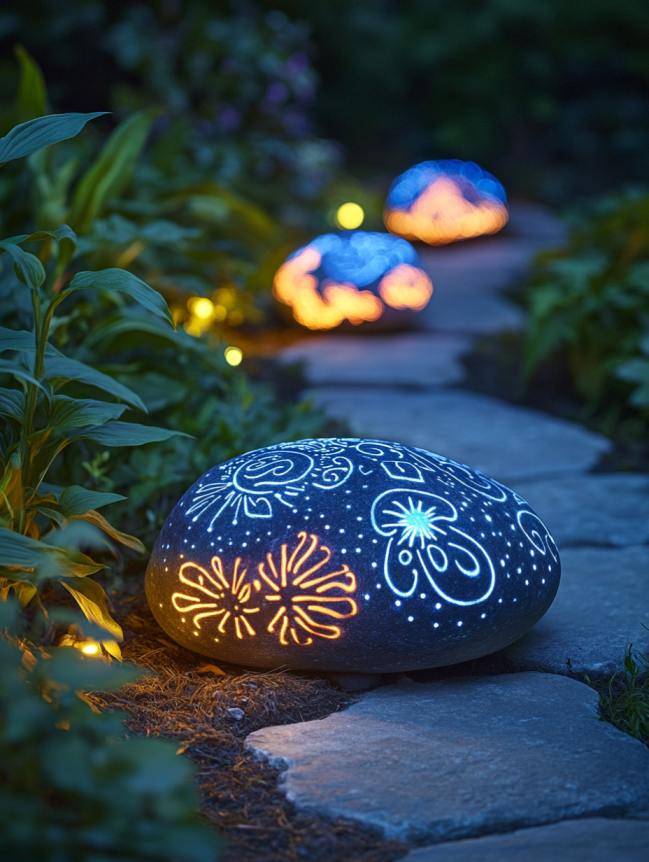
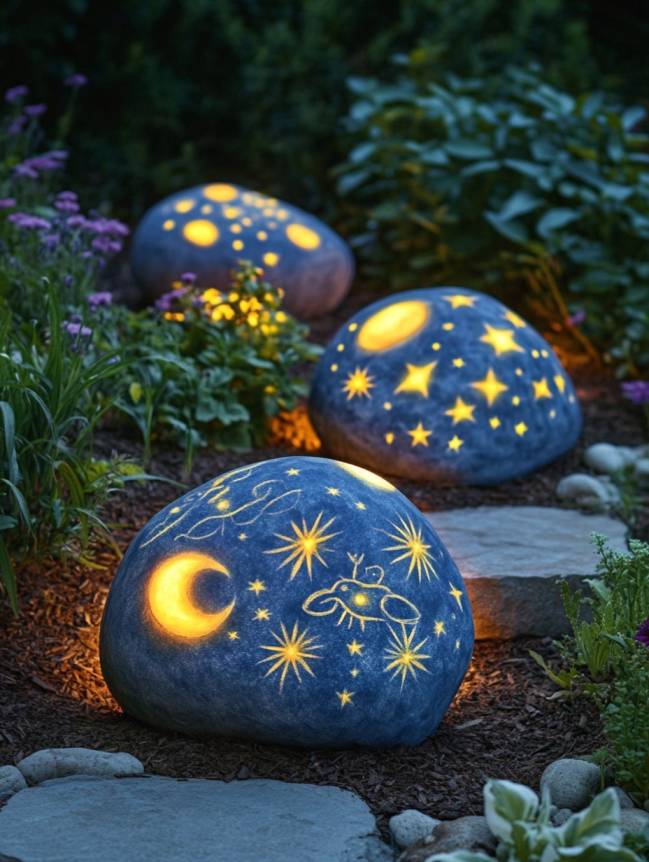

Glow-in-the-dark rocks add a magical touch to your garden, creating an enchanting glow after the sun sets. These rocks are perfect for adding a bit of nighttime wonder to your outdoor space.
How to Create Glow-in-the-Dark Rocks
- Paint the Base: Use glow-in-the-dark paint as the base coat or for specific designs like stars, moons, or fireflies.
- Add Details: Use regular paint to add additional details if needed.
- Seal the Design: Protect your artwork with a clear sealant.
Placement Ideas
- Place glow-in-the-dark rocks along garden paths for nighttime visibility.
- Scatter them among plants to create a starry effect.
- Use them to highlight specific areas of your garden at night.
Benefits
- Nighttime Magic: Add a whimsical, glowing element to your garden after dark.
- Safety: Light up pathways or steps for better visibility at night.
- Unique Feature: Create a conversation piece that surprises and delights visitors.
9. Garden-Themed Patterns: Bringing Nature to Life on Rocks
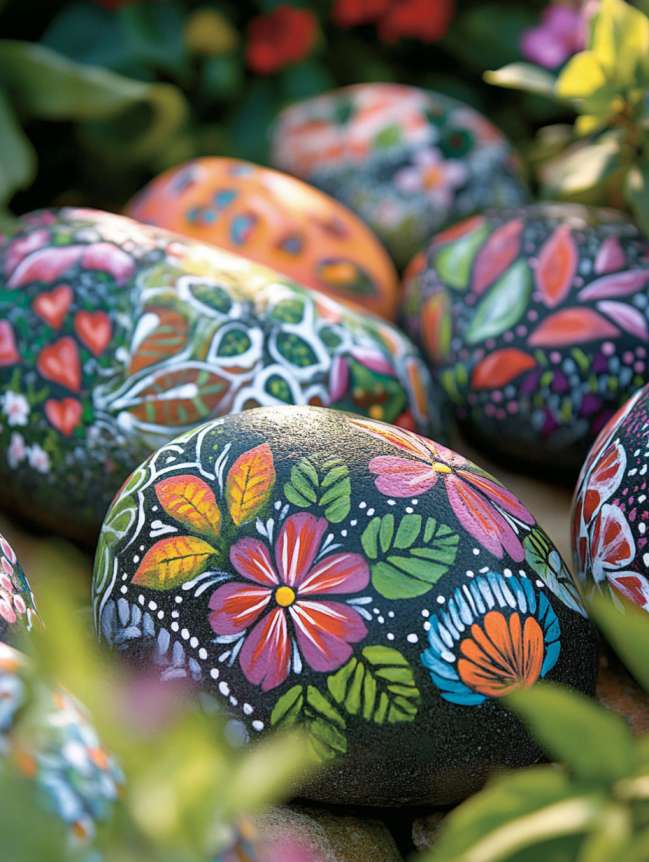

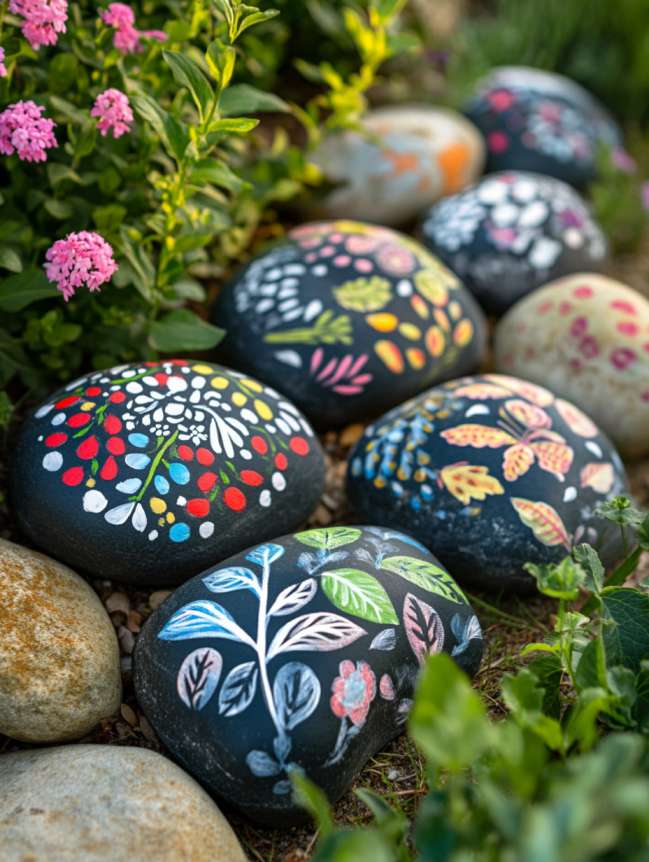

Painting rocks with garden-themed patterns is a wonderful way to blend artistry with the natural beauty of your veggie garden. These patterns can range from simple leaf prints to intricate floral designs, adding a cohesive and artistic touch to your outdoor space.
How to Create Garden-Themed Patterns
- Leaf Prints:
- Collect real leaves with interesting shapes and textures.
- Place the leaf on the rock and use a sponge or brush to apply paint over it.
- Carefully remove the leaf to reveal a detailed print.
- Add additional details like veins or shading with a fine brush.
- Floral Motifs:
- Paint roses, daisies, or sunflowers using vibrant colors.
- Start with the flower’s center and work outward, adding petals and leaves.
- Use fine brushes for intricate details like stamens or petal shading.
- Geometric Designs:
- Use bold lines, shapes, and patterns to create modern, eye-catching designs.
- Experiment with symmetry, repetition, and contrasting colors.
- Use painter’s tape to create clean, sharp edges for geometric patterns.
Placement Ideas
- Scatter patterned rocks throughout your garden beds for a cohesive look.
- Use them as borders or edging for pathways and garden beds.
- Group them together to create a themed display, such as a floral corner or a geometric art installation.
Benefits
- Aesthetic Appeal: Adds a polished, artistic touch to your garden.
- Versatility: Can be tailored to match any garden style or theme.
- Creative Expression: Allows you to experiment with different techniques and designs.
10. Rock Planters: Functional and Decorative Garden Accents
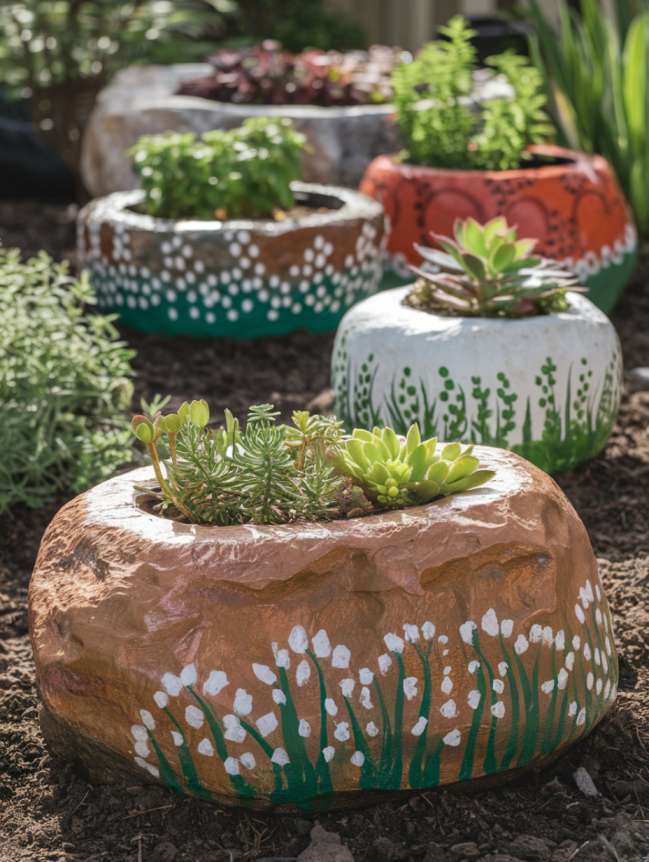


Rock planters are a unique way to combine functionality with creativity. By turning larger rocks into mini planters, you can grow small herbs or succulents while adding a decorative element to your garden.
How to Create Rock Planters
- Choose the Right Rocks: Look for larger rocks with natural indentations or hollow out a section using a chisel and hammer.
- Prepare the Rock: Clean the rock thoroughly and let it dry.
- Add Drainage: Drill a small hole in the bottom for drainage (if needed).
- Paint the Exterior: Use acrylic paints to add colorful designs or leave it natural for a rustic look.
- Fill with Soil: Add potting soil and plant small herbs, succulents, or flowers.
Placement Ideas
- Place rock planters near garden benches or seating areas for a charming touch.
- Use them as centerpieces for garden tables or outdoor decor.
- Group several rock planters together to create a mini garden display.
Benefits
- Space-Saving: Ideal for small gardens or patios.
- Unique Decor: Adds a one-of-a-kind element to your garden.
- Functional Art: Combines practicality with creativity.
11. Storytelling Rocks: Adding a Narrative to Your Garden
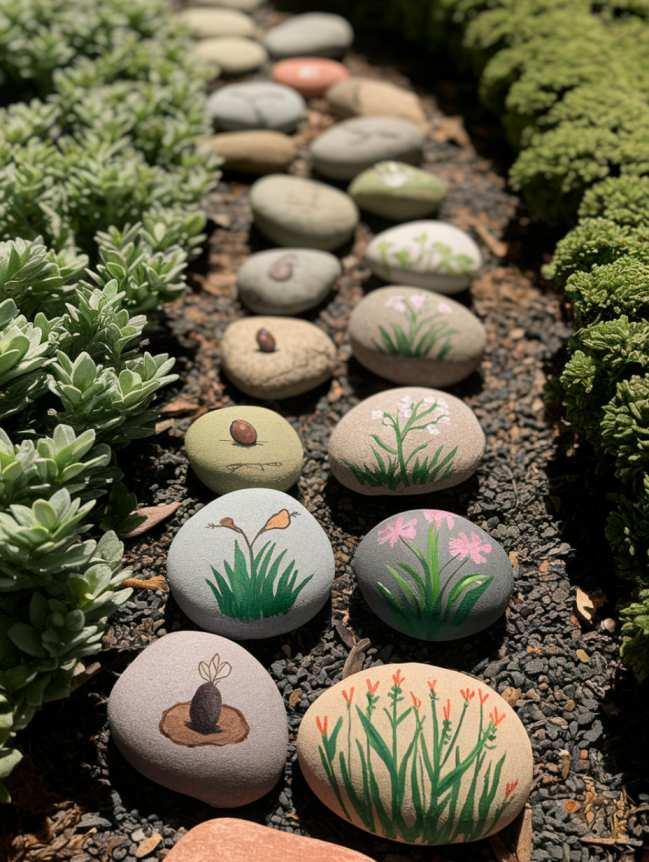
Storytelling rocks allow you to create a visual narrative in your garden, engaging visitors and adding a layer of storytelling to your outdoor space.
How to Create Storytelling Rocks
- Choose a Theme: Decide on a story or sequence, such as the life cycle of a plant or a garden fairy tale.
- Paint the Rocks: Create a series of rocks that depict different scenes or characters.
- For a plant’s life cycle: Paint a seed, sprout, mature plant, and flower.
- For a fairy tale: Paint characters like gnomes, fairies, or magical trees.
- Arrange the Rocks: Place the rocks in a specific order to tell the story.
Placement Ideas
- Create a “story path” where visitors can follow the sequence of rocks.
- Use storytelling rocks as part of a themed garden area, such as a fairy garden or pollinator corner.
- Display them in a prominent spot where they can be easily seen and appreciated.
Benefits
- Engaging: Adds an interactive element to your garden.
- Educational: Teaches visitors about nature, gardening, or storytelling.
- Creative: Allows you to express your imagination and share a story.
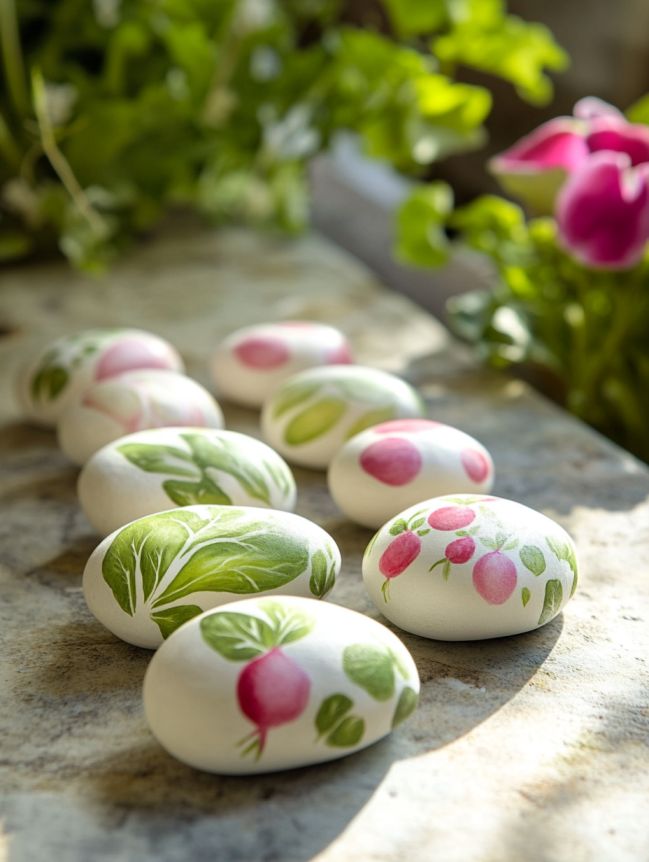
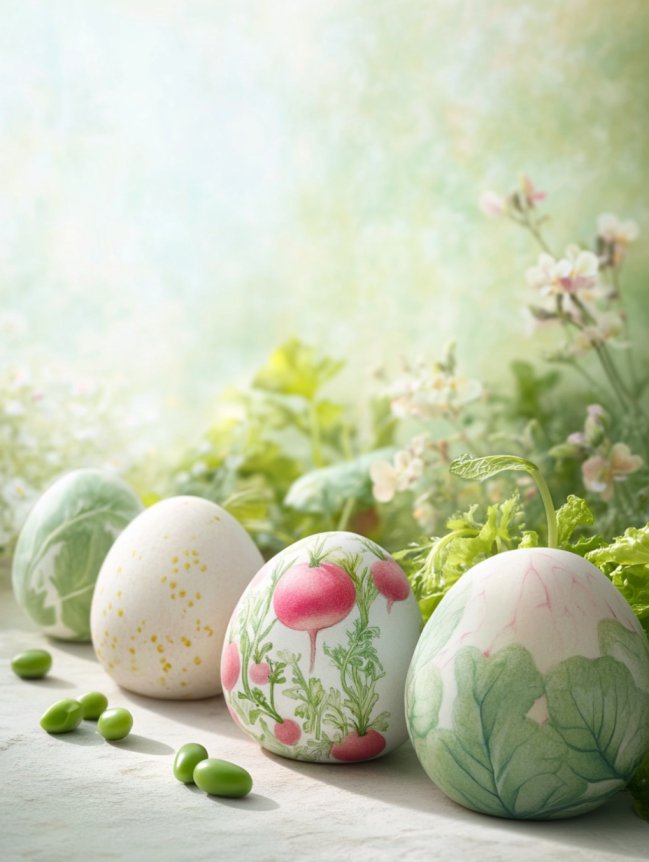
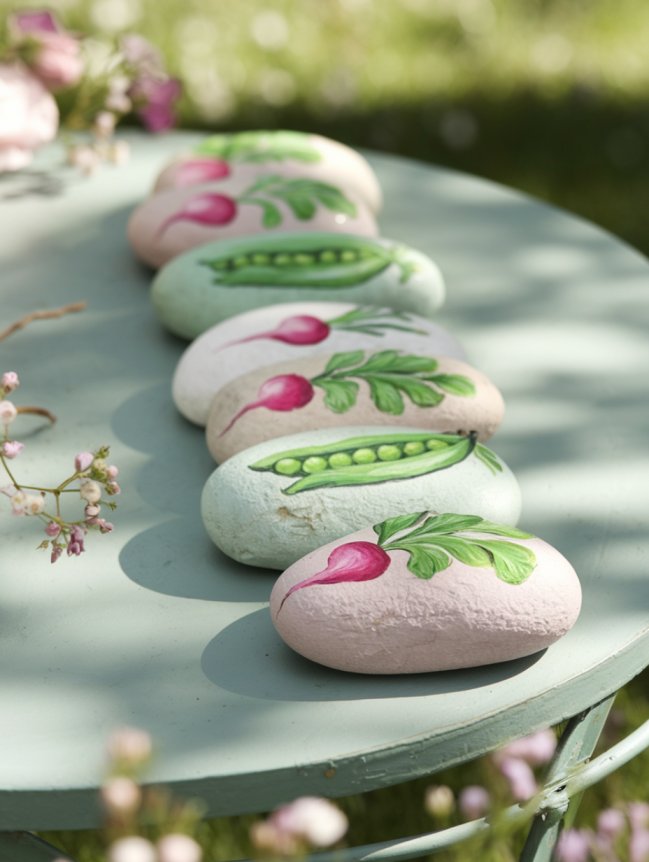
12. Seasonal Veggie Rocks: Celebrating the Harvest
- For Fall Season

2. For Summer Season


3. For Fall Season
4. For Winter Season
Seasonal veggie rocks are a fun way to celebrate the changing seasons and the vegetables you’re growing throughout the year.
How to Create Seasonal Veggie Rocks
- Spring: Paint radishes, peas, and lettuce in pastel colors.
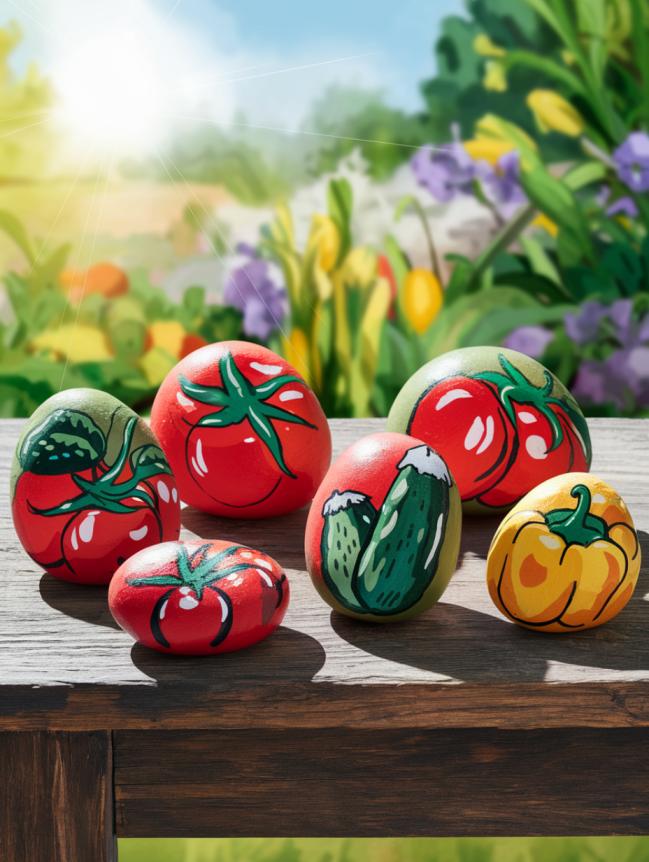
- Summer: Paint tomatoes, cucumbers, and peppers in bright, vibrant hues.
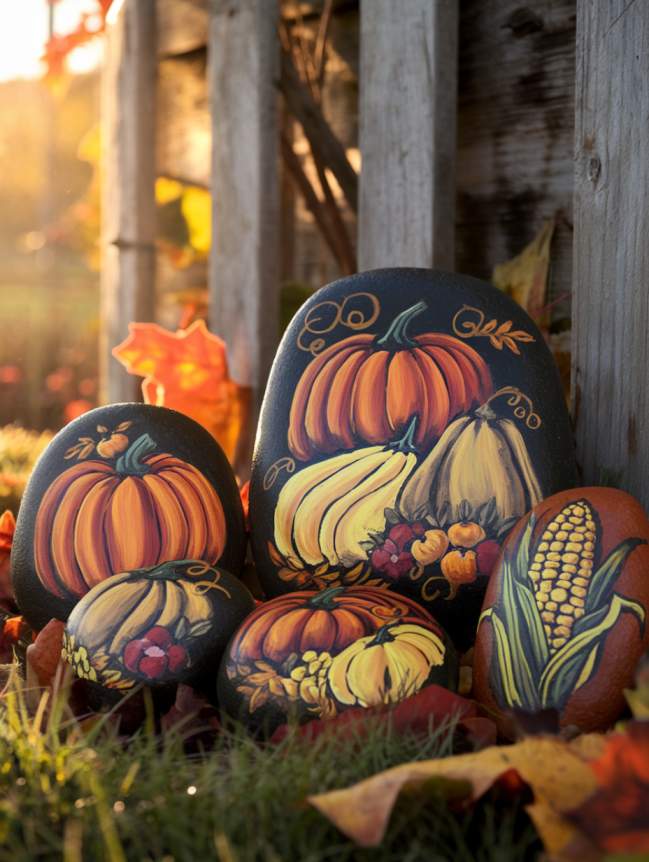
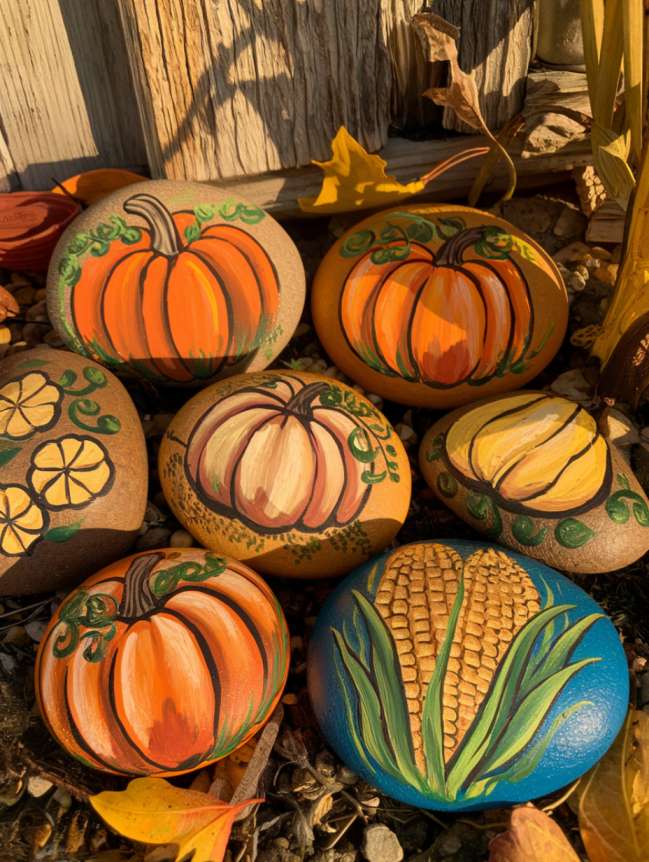
- Fall: Paint pumpkins, squash, and corn in warm autumn tones.
- Winter: Paint root vegetables like carrots and beets in deep, rich colors.
Placement Ideas
- Use seasonal rocks to label your vegetable patches.
- Create a seasonal display in a specific area of your garden.
- Swap out rocks as the seasons change to keep your garden decor fresh.
Benefits
- Timely Decor: Reflects the current season and harvest.
- Educational: Helps you and others identify seasonal crops.
- Festive: Adds a celebratory touch to your garden.
13. Garden Signposts: Practical and Decorative Markers
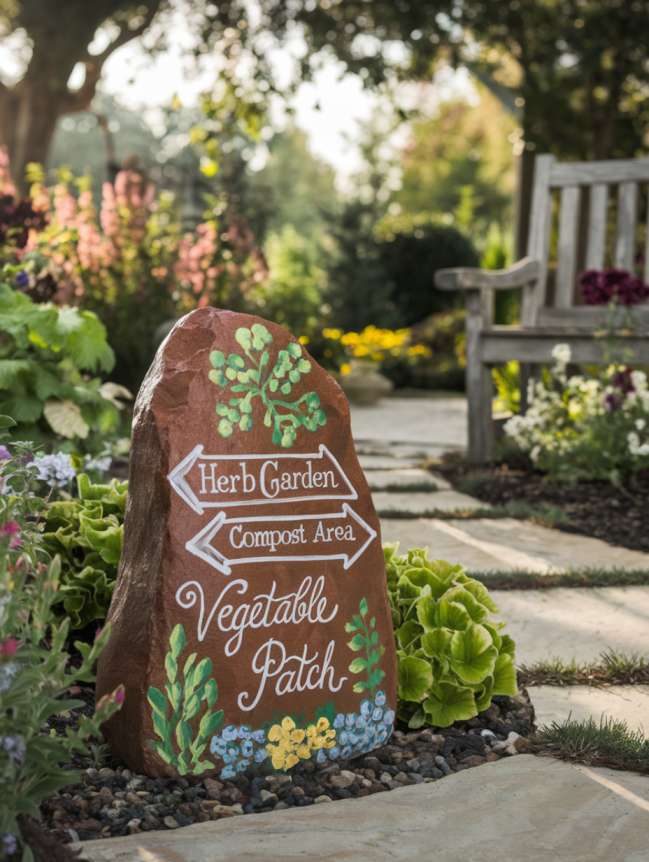
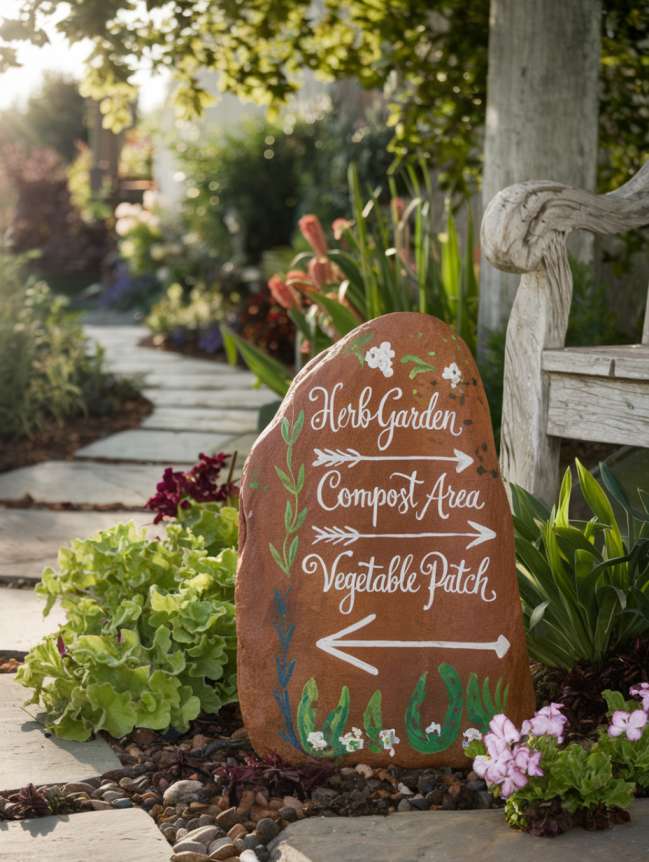
Garden signposts painted on rocks are both functional and decorative, helping you and your visitors navigate your garden with ease.
How to Create Garden Signposts
- Choose a Design: Paint arrows, words, or symbols to indicate directions or labels.
- Add Details: Use bold colors and clear lettering for visibility.
- Seal the Design: Protect your signposts with a weatherproof sealant.
Placement Ideas
- Place signpost rocks at the entrance of your garden or near key areas.
- Use them to mark specific sections, such as “Herb Corner” or “Compost Area.”
- Create a “Welcome to My Garden” sign for a friendly touch.
Benefits
- Practical: Helps organize and navigate your garden.
- Decorative: Adds a personalized and artistic element.
- Durable: Rocks are long-lasting and weather-resistant.
14. Garden Mandalas: Meditative and Beautiful
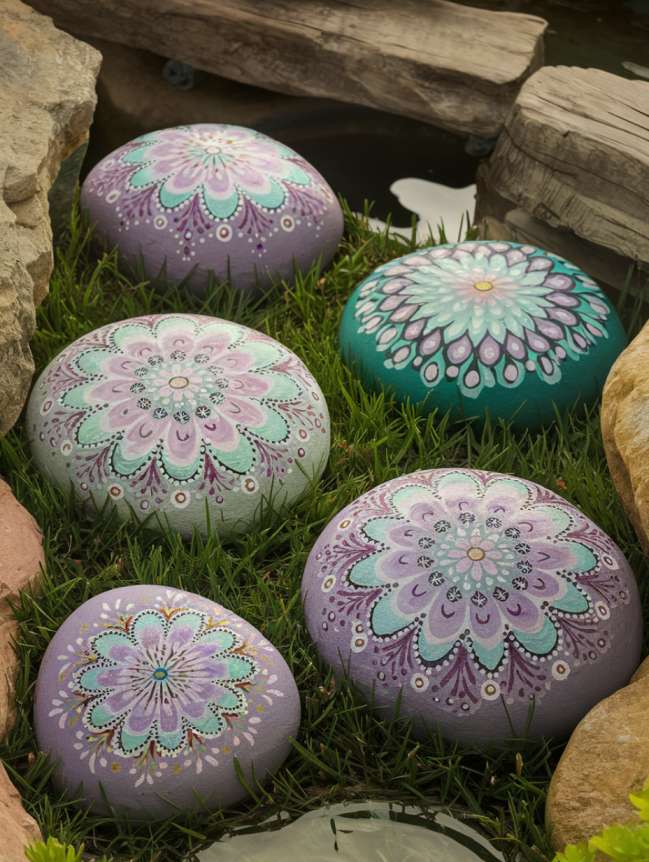
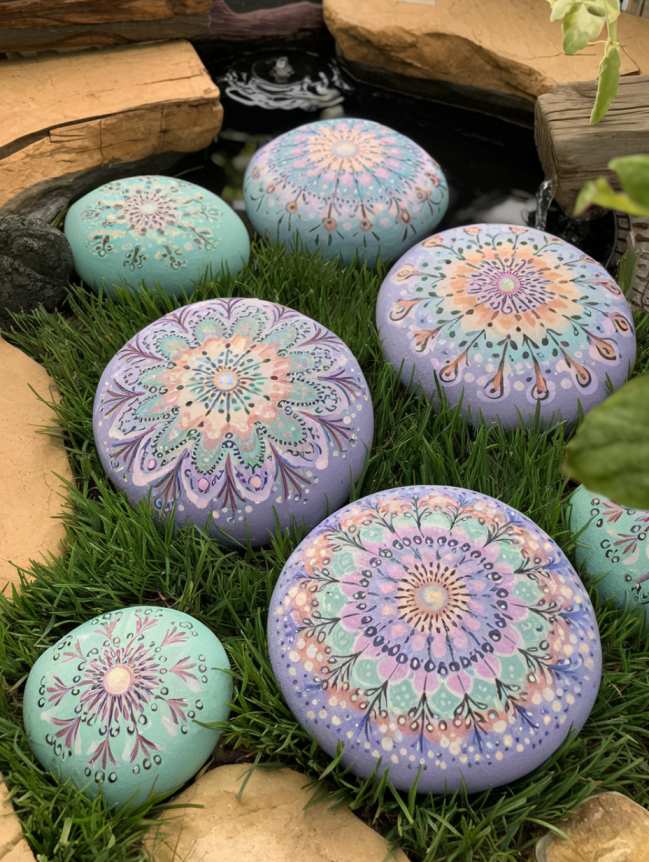
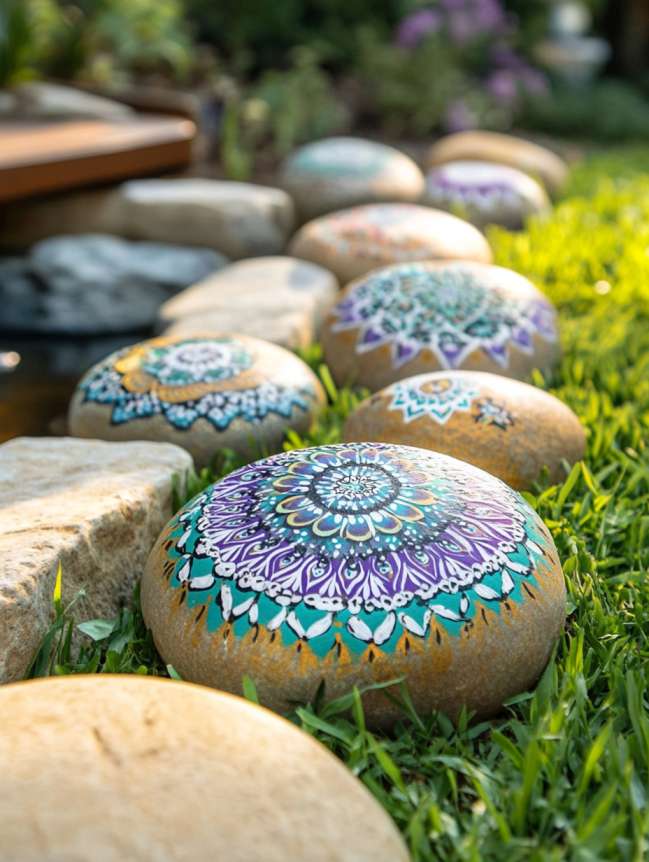
Garden mandalas are intricate, circular designs that add a sense of calm and harmony to your garden.
How to Create Garden Mandalas
- Start with a Base: Paint the rock in a light color as the background.
- Add Patterns: Use fine brushes to create symmetrical patterns, starting from the center and working outward.
- Use Vibrant Colors: Choose colors that complement your garden’s palette.
Placement Ideas
- Place mandala rocks in quiet, meditative areas of your garden.
- Use them as focal points in flower beds or near seating areas.
- Group several mandala rocks together for a stunning display.
Benefits
- Calming Effect: Adds a sense of peace and tranquility.
- Artistic: Showcases your creativity and attention to detail.
- Unique Decor: Makes your garden stand out with intricate designs.
15. Garden-Themed Word Rocks: Motivational and Inspirational
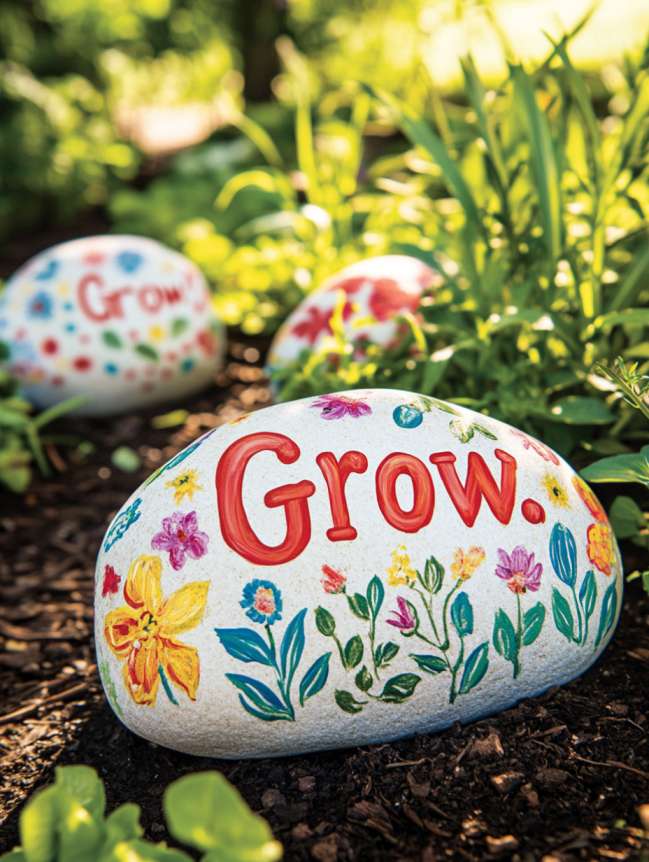
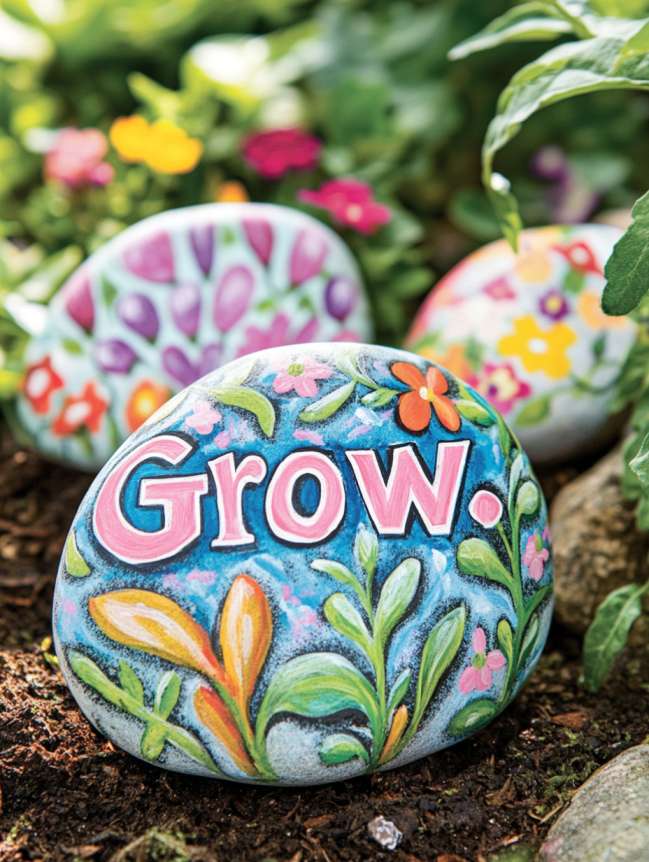


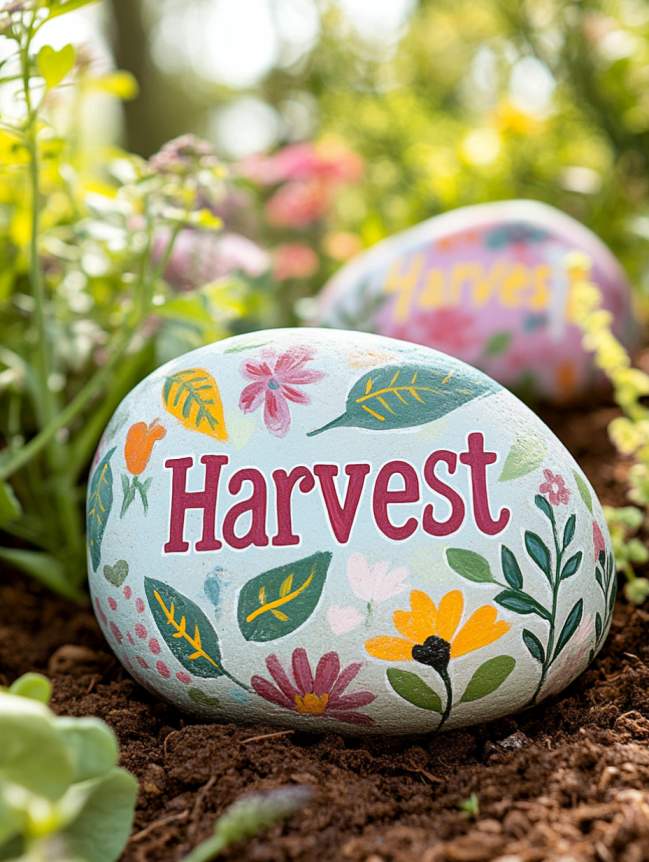
Garden-themed word rocks add a motivational and inspirational touch to your garden, encouraging positivity and growth.
How to Create Word Rocks
- Choose Your Words: Pick short, uplifting phrases like “Grow,” “Bloom,” or “Harvest.”
- Paint the Base: Use a light-colored paint as the background.
- Add the Text: Use a fine brush or paint pen to write the word neatly.
- Decorate: Add small designs like flowers, leaves, or vines around the text.
Placement Ideas
- Scatter word rocks throughout your garden for a motivational touch.
- Create a “word path” where visitors can read the messages as they walk.
- Use them as focal points in flower beds or near seating areas.
Benefits
- Emotional Uplift: Adds positivity and inspiration to your garden.
- Personal Touch: Reflects your values and personality.
- Conversation Starters: Engages visitors with thoughtful messages.
16. Rock Garden Borders: Defining Your Garden Spaces
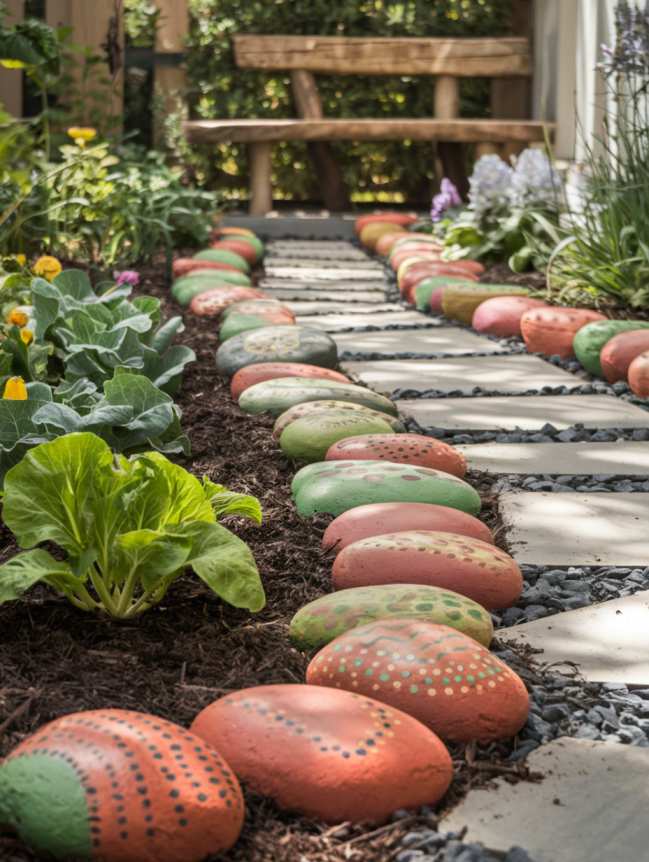
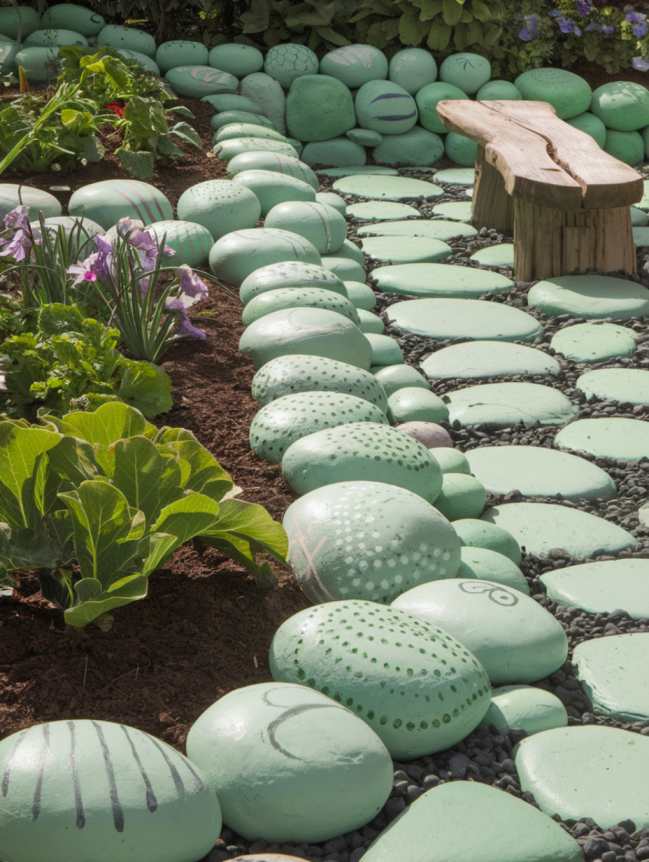
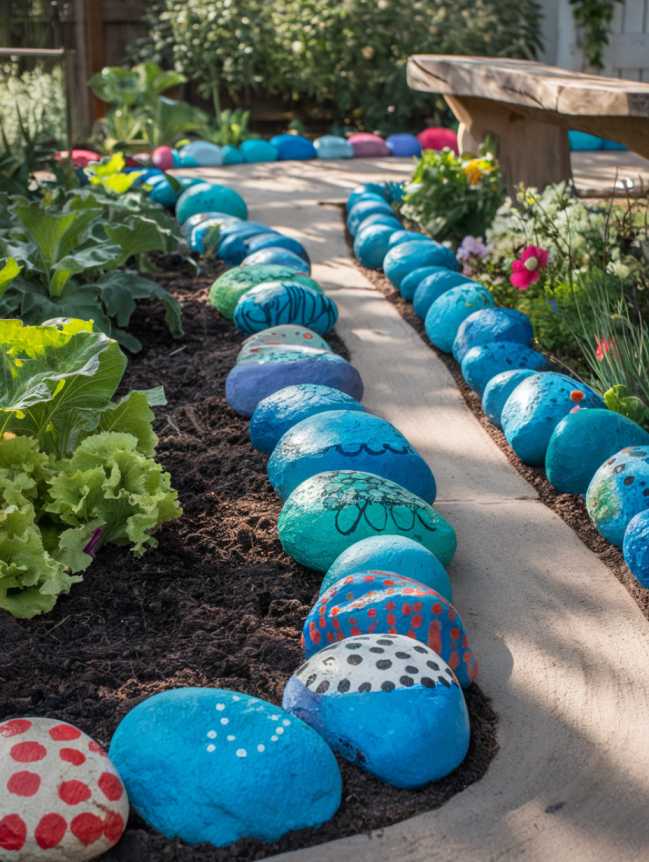

Rock garden borders are a colorful and creative way to define the edges of your garden beds and pathways.
How to Create Rock Borders
- Choose Your Design: Paint rocks in uniform patterns (e.g., stripes or polka dots) or mix and match different designs.
- Arrange the Rocks: Place the painted rocks along the edges of your garden beds or pathways.
- Seal the Design: Protect your rocks with a weatherproof sealant.
Placement Ideas
- Use rock borders to define the edges of vegetable patches or flower beds.
- Create a colorful pathway by lining the edges with painted rocks.
- Use them to separate different sections of your garden.
Benefits
- Visual Appeal: Adds color and structure to your garden.
- Functional: Helps define and organize garden spaces.
- Creative: Allows you to experiment with patterns and designs.
17. Rock Garden Art Installations: Stunning Centerpieces
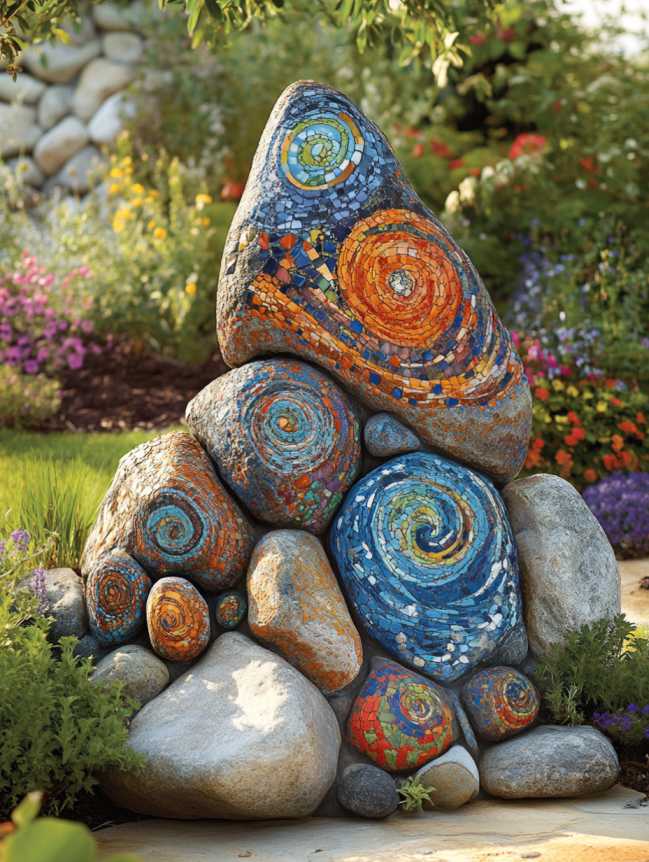

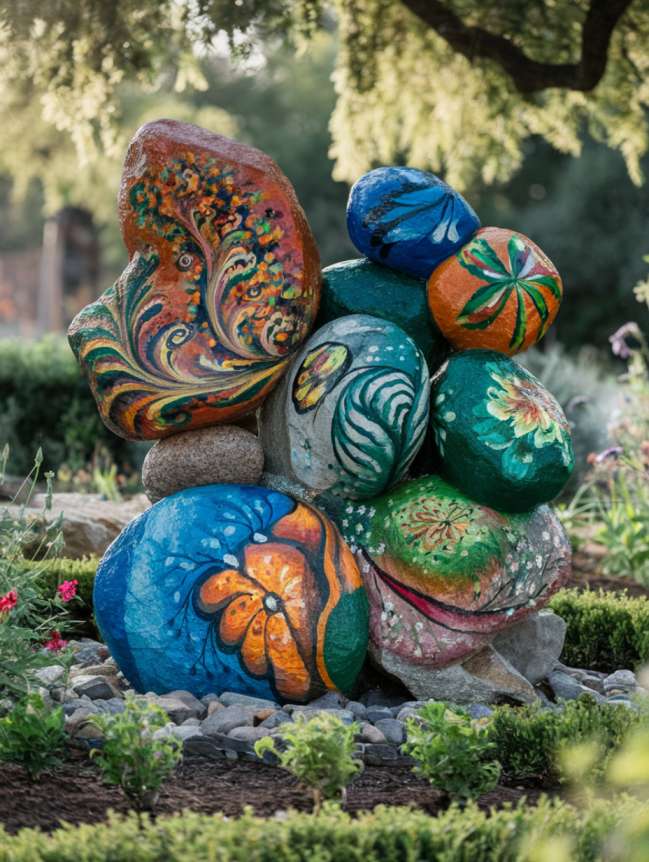
Rock art installations are larger, more elaborate creations that serve as stunning centerpieces for your garden.
How to Create Rock Art Installations
- Choose a Theme: Decide on a design, such as a butterfly, flower, or abstract pattern.
- Paint the Rocks: Use multiple rocks to create the design, painting each one individually.
- Arrange the Rocks: Place the painted rocks together to form the complete image or sculpture.
Placement Ideas
- Use rock installations as focal points in your garden.
- Create a “rock garden” area where multiple installations are displayed.
- Use them to highlight specific areas, such as a pollinator corner or seating area.
Benefits
- Eye-Catching: Adds a dramatic and artistic element to your garden.
- Unique: Makes your garden stand out with one-of-a-kind creations.
- Versatile: Can be tailored to match any garden style or theme.
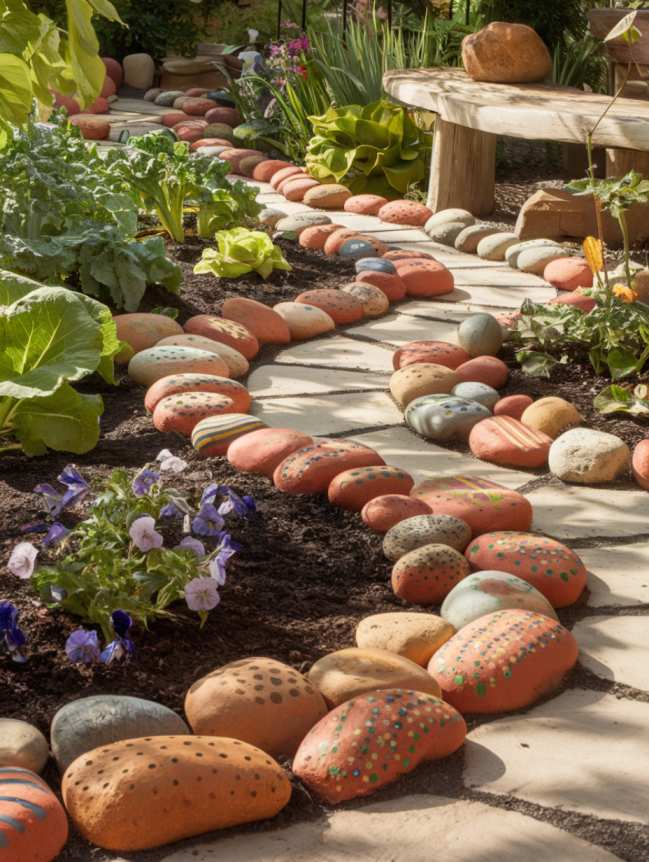
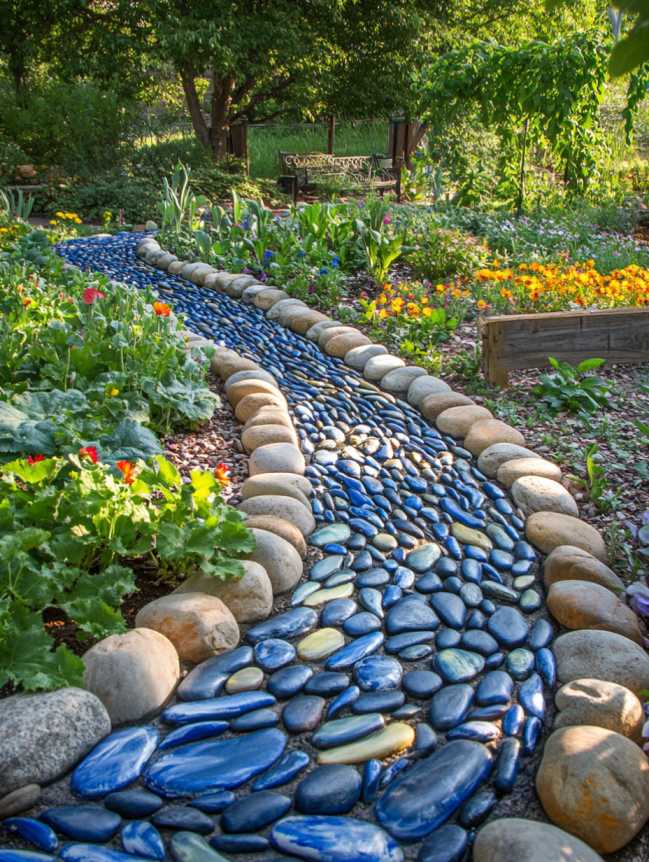
18. Rock Garden Path: Colorful and Functional Walkways

Rock garden paths are a creative and functional way to add color and structure to your garden.
How to Create a Rock Path
- Choose Your Rocks: Select large, flat rocks that are suitable for walking on.
- Paint the Rocks: Use bright, bold colors or intricate designs to paint each rock.
- Arrange the Rocks: Place the painted rocks in a row or pattern to create a pathway.
Placement Ideas
- Use rock paths to connect different areas of your garden.
- Create a colorful walkway leading to a seating area or focal point.
- Use them to define the edges of garden beds or pathways.
Benefits
- Functional: Provides a clear and durable walking surface.
- Decorative: Adds color and visual interest to your garden.
- Creative: Allows you to experiment with patterns and designs.
Tips for Rock Painting Success
Rock painting is a fun and rewarding activity, but a few key tips can help ensure your creations are both beautiful and durable. Whether you’re a beginner or an experienced artist, these guidelines will set you up for success:
1. Choose the Right Rocks
The foundation of a great painted rock is, well, the rock itself! Selecting the right rocks will make the painting process easier and the final result more polished.
- Smooth and Flat Surfaces: Rocks with smooth, flat surfaces are easier to paint on, especially for detailed designs. Avoid rocks with deep cracks or rough textures.
- Size Matters: Choose rocks that are large enough to paint on but small enough to fit comfortably in your garden. Medium-sized rocks (about 2-4 inches in diameter) are ideal.
- Where to Find Rocks: Look for rocks at riverbeds, beaches, or even in your backyard. You can also purchase smooth rocks from craft stores or online.
- Clean Thoroughly: Wash the rocks with soap and water to remove dirt and debris. Let them dry completely before painting.
2. Use Quality Supplies
Investing in good-quality materials will make a big difference in the outcome of your painted rocks.
- Acrylic Paints: These are the best choice for rock painting because they are vibrant, durable, and easy to work with. Look for paints labeled “weather-resistant” for outdoor use.
- Fine Brushes: A variety of brush sizes will help you create both broad strokes and intricate details. Fine-tipped brushes are especially useful for adding small details like eyes, text, or patterns.
- Sealant: A weatherproof sealant or varnish is essential to protect your designs from rain, sun, and other outdoor elements. Spray sealants are quick and easy to use, while brush-on sealants offer more control.
- Optional Supplies: Paint pens, stencils, and sponges can also be helpful for creating specific effects or patterns.
3. Keep It Simple
If you’re new to rock painting, starting with simple designs can help you build confidence and develop your skills.
- Basic Shapes: Begin with easy designs like dots, stripes, or geometric patterns.
- Minimalist Approach: Focus on one or two colors and a single element, such as a flower, leaf, or word.
- Practice First: Test your designs on paper or a spare rock before committing to the final piece.
- Gradual Progression: As you gain experience, you can move on to more complex designs like animals, landscapes, or intricate patterns.
4. Involve the Family
Rock painting is a fantastic activity for all ages, making it a great way to spend quality time with family and friends.
- Kid-Friendly Designs: Let kids paint simple designs like smiley faces, hearts, or their favorite animals.
- Collaborative Projects: Work together on larger rocks or create a themed set (e.g., a family of ladybugs or a rainbow collection).
- Garden Contributions: Encourage everyone to contribute their own unique designs to the garden, creating a sense of ownership and pride.
- Educational Opportunity: Use rock painting as a chance to teach kids about gardening, pollinators, or color theory.
How to Use Painted Rocks in Your Veggie Garden
Once your rocks are painted and sealed, it’s time to put them to use in your garden. Here are some creative and practical ways to incorporate them:
1. Label Your Plants
Painted rocks make excellent plant markers, helping you keep track of what’s growing in your garden.
- How to Use: Paint the name of the plant or a small image of the vegetable/herb on the rock. Place it at the base of the corresponding plant.
- Benefits: Unlike plastic or wooden markers, painted rocks are durable, eco-friendly, and visually appealing.
- Examples: A tomato-shaped rock for tomato plants, a carrot-shaped rock for carrots, or a leafy green rock for lettuce.
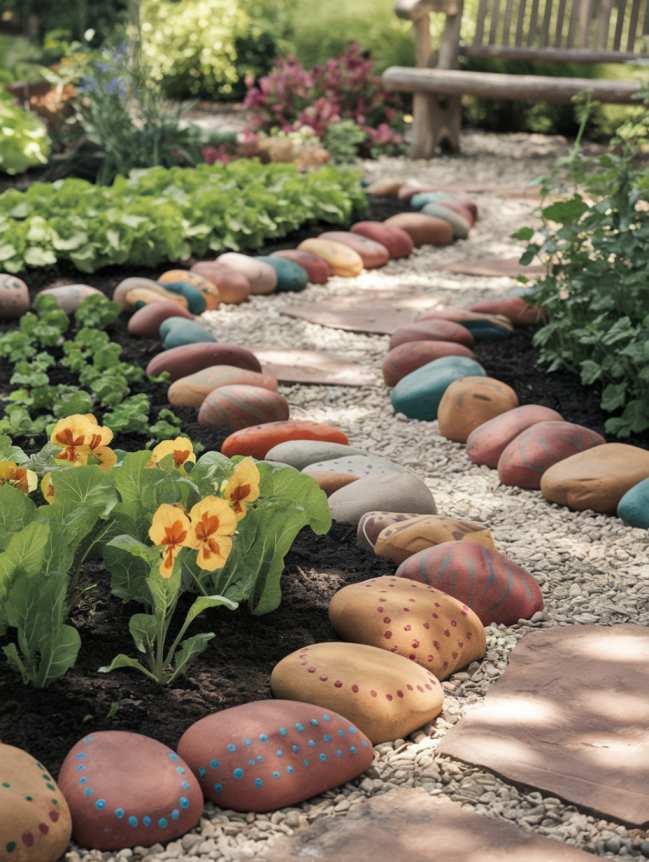
2. Create a Pathway
Line your garden path with painted rocks to create a colorful and functional walkway.
- How to Use: Paint rocks in coordinating colors or patterns and arrange them along the edges of your path.
- Benefits: Adds visual interest and helps define the pathway, making it easier to navigate your garden.
- Design Ideas: Use rainbow colors, alternating patterns, or a gradient effect for a cohesive look.
3. Deter Pests
Brightly colored rocks can help keep pests like rabbits and birds away from your veggies.
- How to Use: Paint rocks in bright, reflective colors (e.g., yellow, orange, or red) and place them near plants that are prone to pest damage.
- Benefits: The unexpected colors can confuse or scare pests, reducing the need for chemical repellents.
- Examples: Scatter painted rocks around lettuce, cabbage, or other vulnerable plants.
4. Add a Focal Point
Group painted rocks together to create a garden centerpiece or focal point.
- How to Use: Arrange rocks in a cluster or stack them to create a small sculpture. Use rocks with complementary designs or colors for a cohesive look.
- Benefits: Draws attention to a specific area of your garden and adds a unique artistic element.
- Examples: Create a rock tower, a mini garden scene, or a themed display (e.g., a butterfly garden or a pollinator corner).
Additional Tips for Using Painted Rocks in Your Garden
- Rotate Designs: Switch out rocks with seasonal designs to keep your garden looking fresh and festive year-round.
- Mix and Match: Combine different types of painted rocks (e.g., labels, animals, and quotes) for a diverse and dynamic garden.
- Protect Your Artwork: Reapply sealant periodically to ensure your painted rocks stay vibrant and protected from the elements.
- Have Fun: Don’t be afraid to experiment with colors, patterns, and designs. Your garden is a reflection of your creativity, so let your imagination run wild!
Conclusion
Incorporating rock painting ideas for veggie garden is a simple yet impactful way to personalize your outdoor space. Whether you’re labeling plants, adding decorative touches, or creating a whimsical theme, painted rocks are a fun and creative addition to any garden. So grab some rocks, paints, and brushes, and let your imagination run wild. Your veggie garden will thank you for the extra dose of charm and creativity!